
In this guide, you'll learn how to configure Jira Automation and Golive to manage and track deployments directly from Jira tickets.
This setup enables you to automate environment status updates and deployment actions in Golive based on transitions in Jira issues, improving release coordination and visibility across your organization.
Understand the Solution
Numerous organizations use Jira tickets to manage and track their deployment requests. This approach is particularly effective when coordinating with multiple stakeholders for requesting, approving, and executing application deployments to different environments.
By combining Jira Automation with Golive, you can automate how Environment Statuses and deployments are updated — directly from Jira transitions.
Requirements
-
Golive Cloud installed on Jira Cloud.
-
A Jira project where deployment requests will be managed.
-
Admin permissions to create issue types, workflows, and automation rules.
Info
This configuration has been tested on Jira Cloud, but it should also work on Jira Data Center.
Configuration Overview
You will need to create:
-
One custom Work Type called “Deployment Request”
-
A dedicated Workflow for deployment tracking
-
Four Jira Automation Rules:
-
In Progress (updates Target Environment to “Deploy”)
-
Successful Deployment (creates deployment and marks issues as deployed)
-
Failed Deployment (updates Target Environment to “Down”)
-
Cancellation (rolls back a previously created deployment)
-
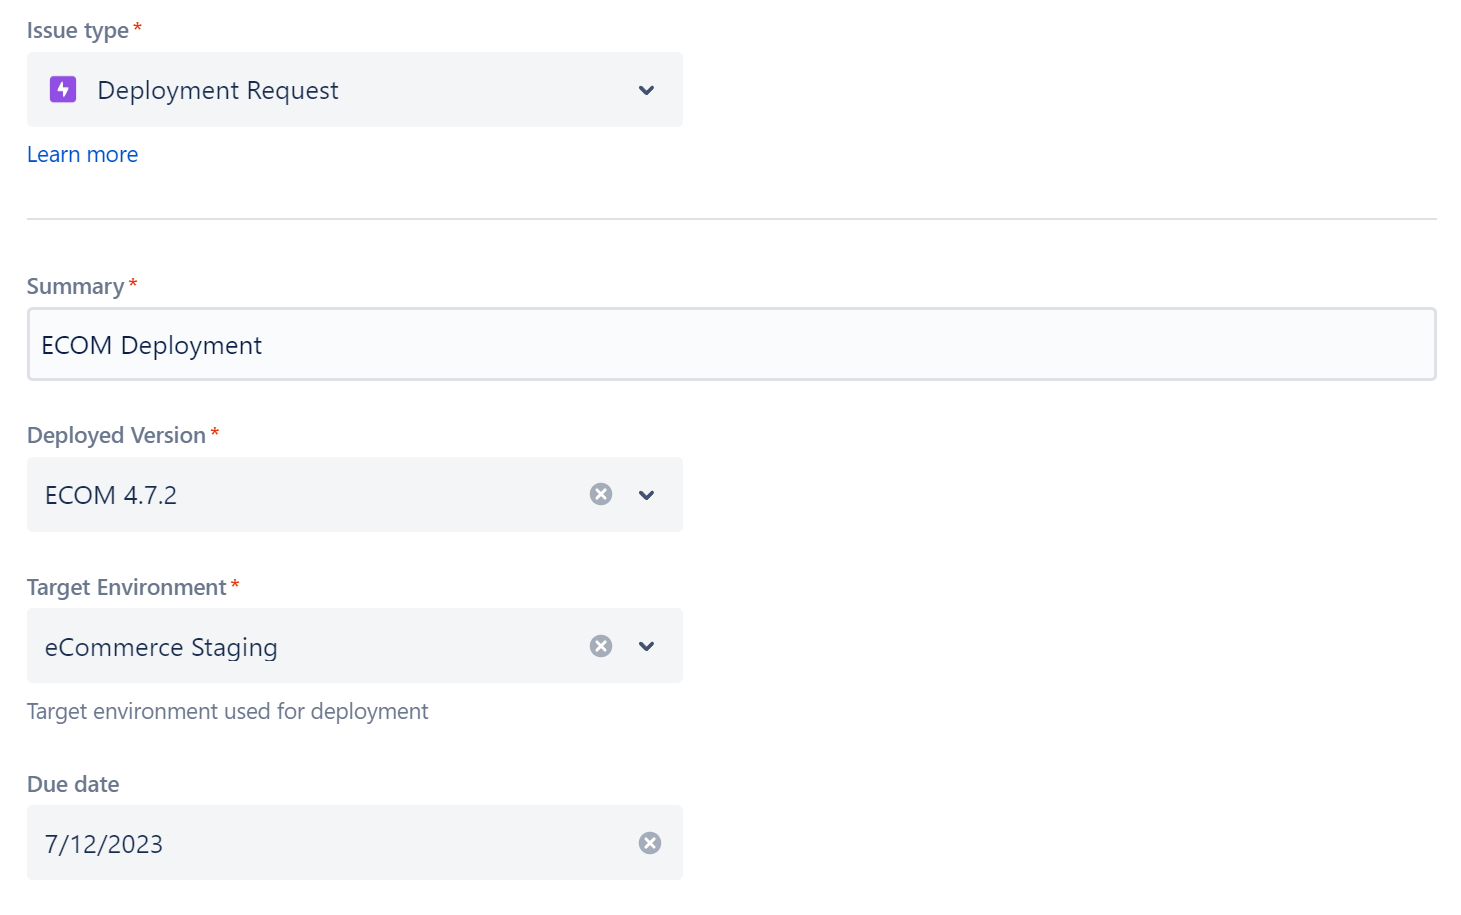
Work Type
A dedicated work type called “Deployment Request” is used to track all deployments to Test and Production environments. Several fields are defined:
-
Deployed Version: A single value “Jira Version” custom field.
-
Target Environment: A single value Environment Custom Field.
-
Other optional fields, like the “Due date” in the screenshot below
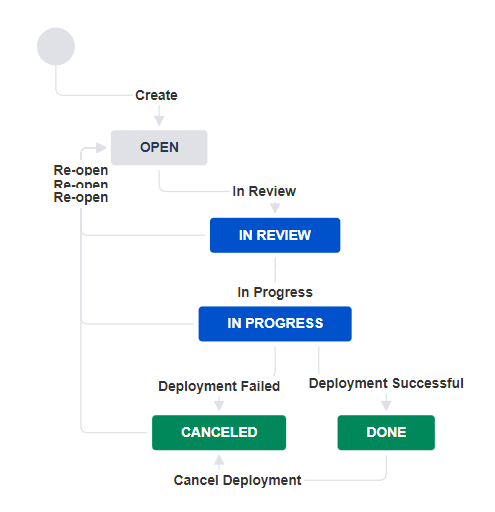
Workflow
A specific workflow is used to track deployment requests and it can be adapted to your needs:
Jira Automations
We are using 4 Jira Automation Rules:
-
When the Request transitions from “In Review” to “In Progress”
-
The Target Environment status is updated to deploy
-
-
When the Request transitions from “In Progress” to “Done” (Deployment Successful)
-
The selected “Deployed Version” is deployed to the selected “Target Environment” in Golive
-
The Jira work items marked as ‘Done’ and fixed in the “Deployed Version” are automatically marked as deployed in Golive and Jira
-
The Target Environment status is updated to Up
-
-
When the Request transitions from “In Progress” to “Canceled” (Deployment Failed)
-
The Target Environment status is updated to down
-
-
When the Request transitions from “Done” to “Canceled” (Cancel Deployment)
-
We rollback by deleting the deployment in Golive and in the Jira issues that were marked as deployed
-
Configuration Steps
Step 1: Create the “Deployment Request” Work Type
If you are using a company-managed Jira Project, the following steps should be performed by a Jira Admin:
-
Create a new Work Type called Deployment Request.
-
Add the following fields:
-
Deployed Version: A single value “Jira Version” custom field.
-
Target Environment: A single value Environment Custom Field.
-
-
Create your Workflow and assign it to your “Deployment Request”.
If you are using a team-managed Jira Project, you just need to be Project Admin in order to create this new “Deployment Request” issue type and define a workflow.
Step 2: Create the “Deployment Request – In Progress” Automation Rule
This rule updates the Target Environment status to deploy when the request transitions from “In Review” to “In Progress.”
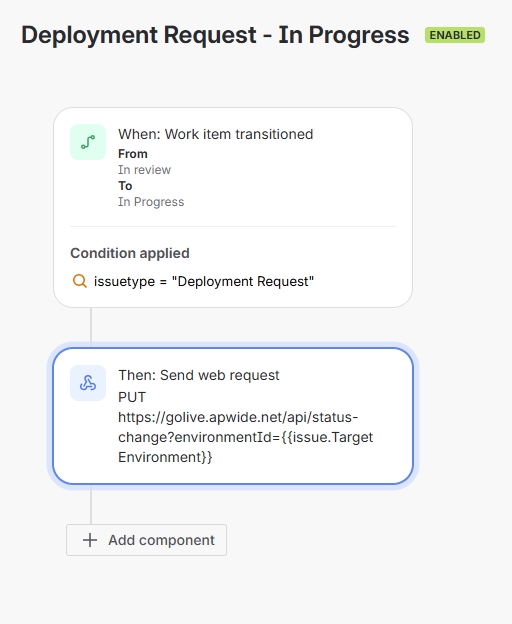
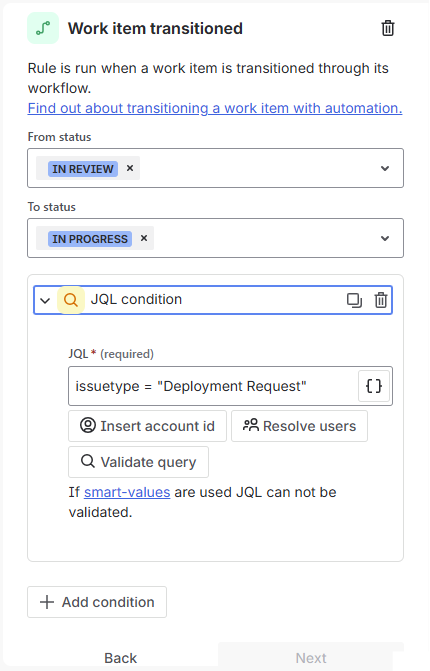
1. Trigger
When issue transitions from In Review → In Progress. You can also specify additional criteria to be met e.g. work type.
2. Send web request (update Target Environment status)
Web request URL:
https://golive.apwide.net/api/status-change?environmentId={{issue.Target Environment}}
“api-key” header: paste the previously generated Golive API Token
Custom data:
Important
Make sure the status exists in your configuration.
{
  "name": "Deploy"
}
Step 3: Create the “Deployment Request – Successful” Automation Rule
This rule runs when a deployment request transitions from In Progress to Done (Deployment Successful).
It performs the following actions:
-
Deploys the selected Deployed Version to the Target Environment in Golive.
-
Marks related Jira issues as deployed in both Golive and Jira.
-
Updates the Target Environment status to Up .
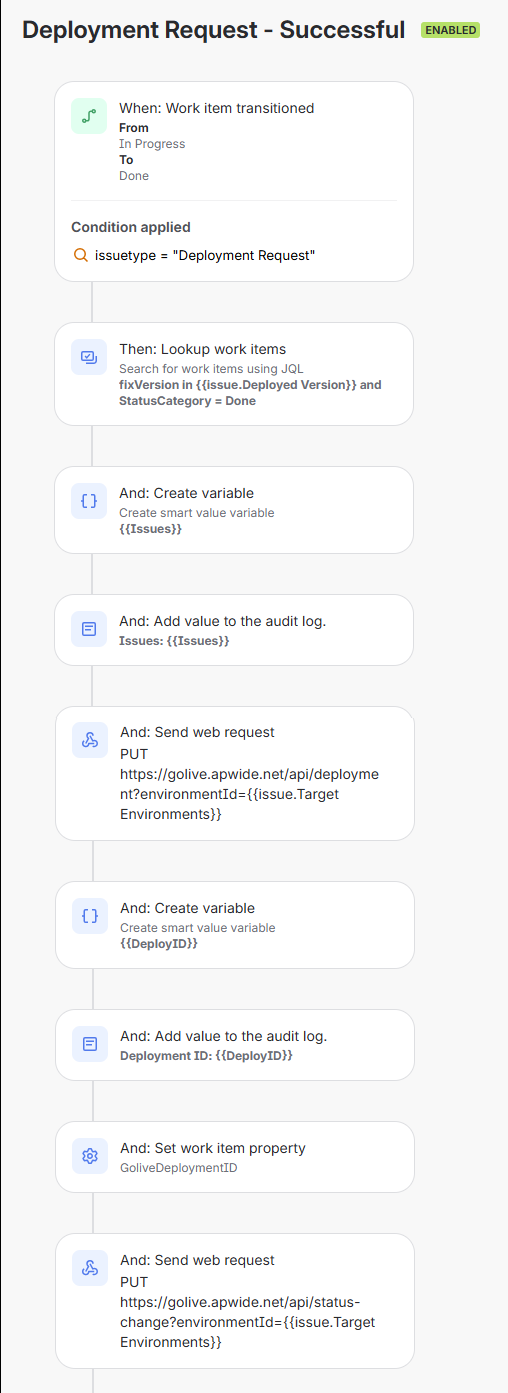
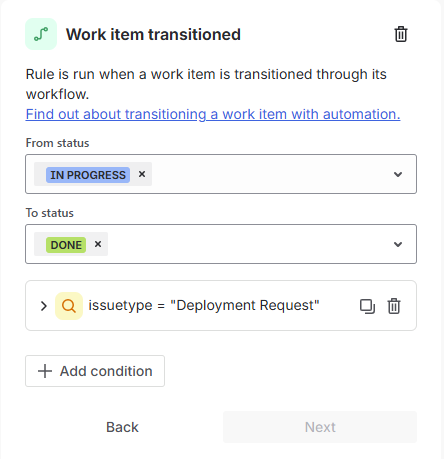
1. Trigger
When issue transitions from In Progress → Done. You can also specify additional criteria to be met e.g. work type.
2. Lookup Work Items

JQL:
fixVersion in ({{issue.Deployed Version}}) and StatusCategory = Done
3. Create Variable
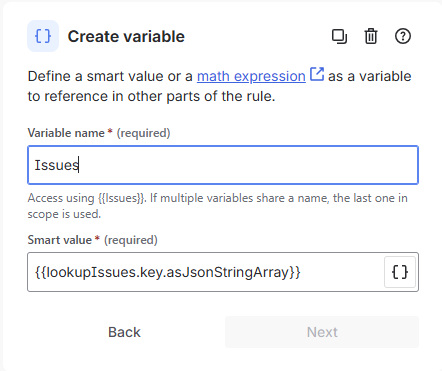
Variable name:
Issues
Smart value:
{{lookupIssues.key.asJsonStringArray}}
4. Log Action
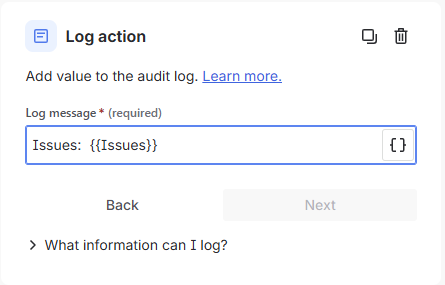
Log message:
Issues: {{Issues}}
5. Send Web Request: Update Deployment of Target Environment
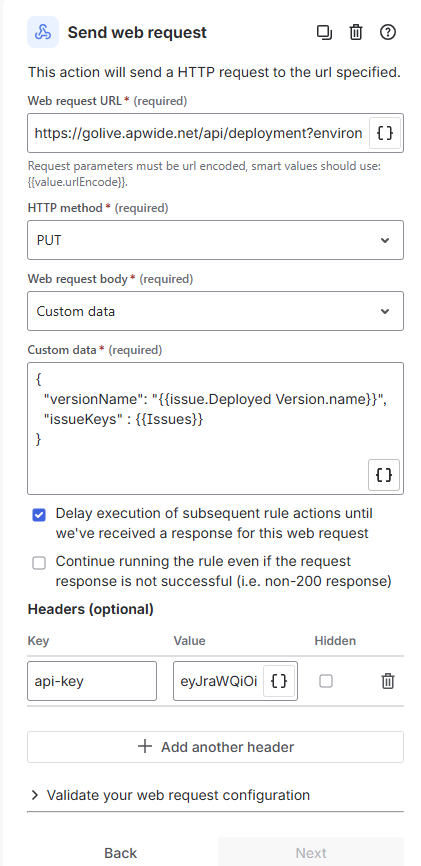
Web request URL:
https://golive.apwide.net/api/deployment?environmentId={{issue.Target Environments}}
Custom data:
{
  "versionName": "{{issue.Deployed Version.name}}",
  "issueKeys" : {{Issues}}
}
“api-key” header: Paste the previously generated Golive API Token
6. Create Variable
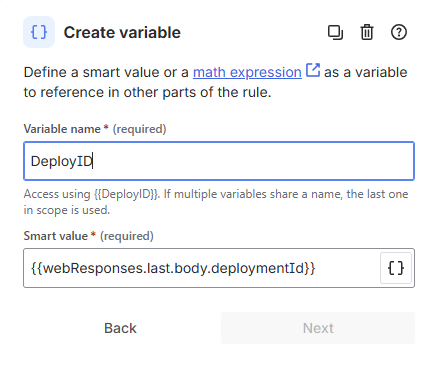
Variable name:
DeployID
Smart value:
{{webResponses.last.body.deploymentId}}
7. Log Action
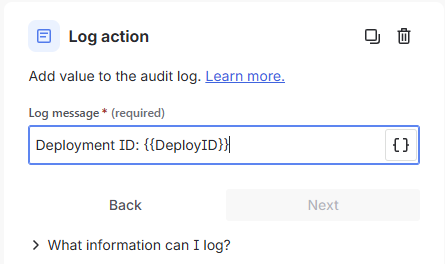
Log message:
Deployment ID: {{DeployID}}
8. Set Entity Property
We are storing the deployment ID with the Jira issue, in order to delete it in case of a future cancellation.

Entity type:
Issue
Property key:
GoliveDeploymentID
Property value:
{{DeployID}}
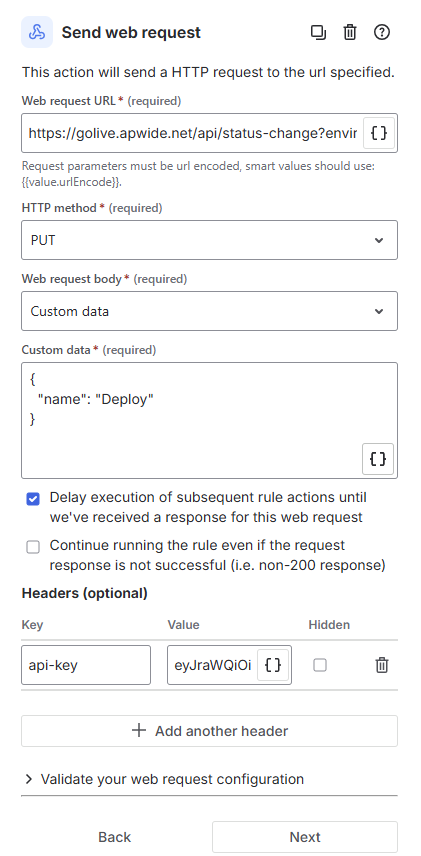
9. Send Web Request: Update Target Environment Status
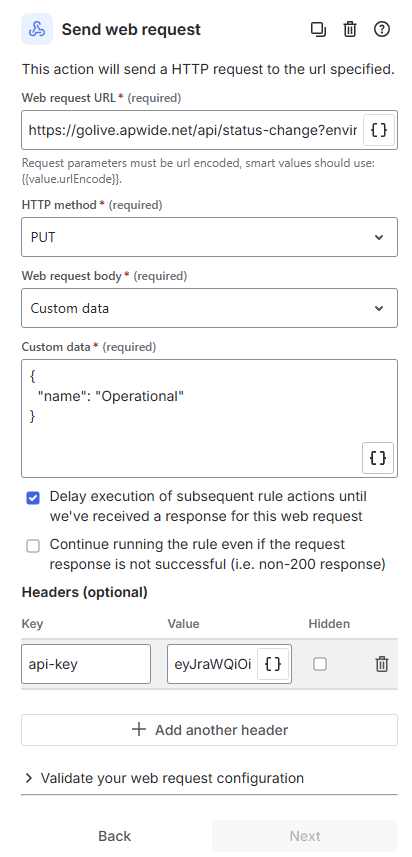
Web request URL:
https://golive.apwide.net/api/status-change?environmentId={{issue.Target Environments}}
“api-key” header: Paste the previously generated Golive API Token
Custom data:
Important
Make sure the status exists in your configuration.
{
  "name": "Operational"
}
Step 4: Create the “Deployment Request – Failed” Automation Rule
This rule updates the Target Environment status to Down when the deployment request transitions from In Progress to Canceled.
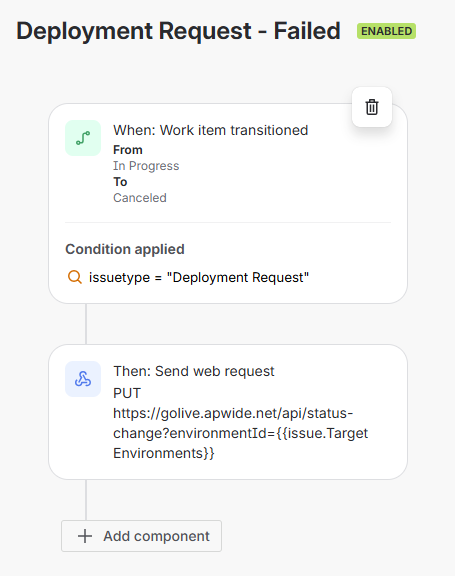
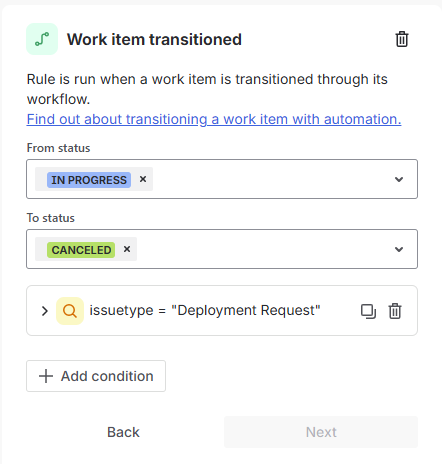
1. Trigger
When issue transitions from In Progress → Canceled. You can also specify additional criteria to be met e.g. work type.
2. Send Web Request: Update Target Environment Status
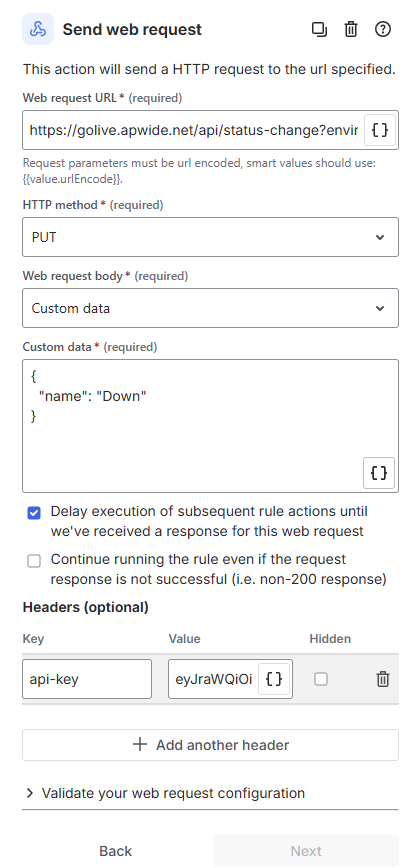
Web request URL:
https://golive.apwide.net/api/status-change?environmentId={{issue.Target Environments}}
“api-key” header: paste the previously generated Golive API Token
Custom data:
Important
Make sure the status exists in your configuration.
{
  "name": "Down"
}
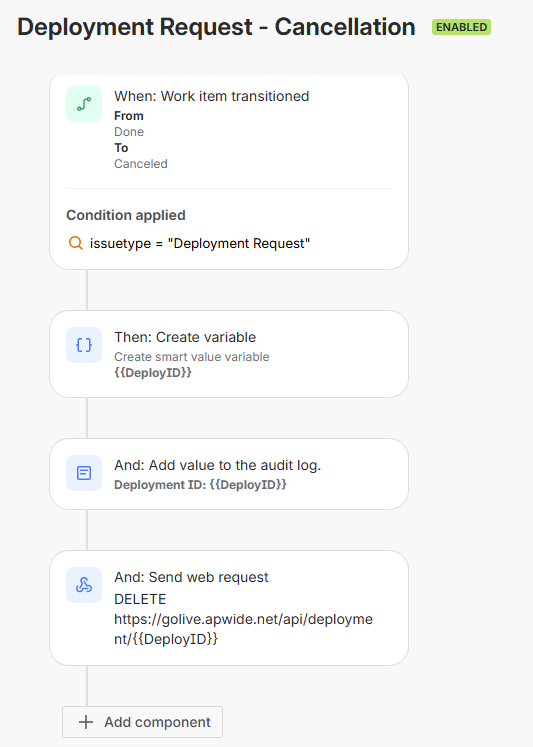
Step 5: Create the “Deployment Request – Cancellation” Automation Rule
This rule rolls back a previously created deployment when the request transitions from Done to Canceled.
It performs the following actions:
-
Deletes the deployment in Golive and Jira.
-
Updates the Target Environment status to Down.
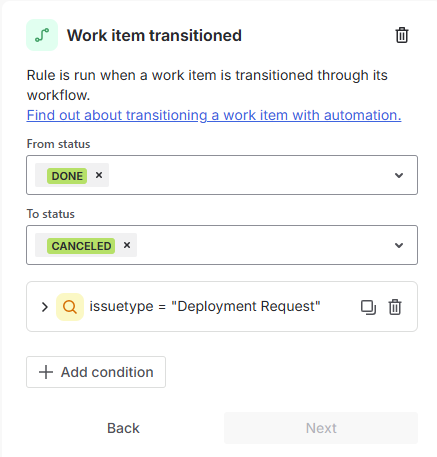
1. Trigger
-
When issue transitions from Done → Canceled. You can also specify additional criteria to be met e.g. work type.
2. Create Variable
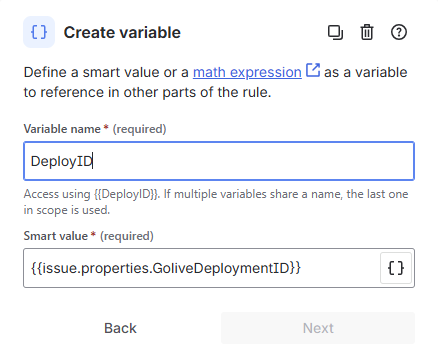
Variable name:
DeployID
Smart value:
{{issue.properties.GoliveDeploymentID}}
3. Log Action
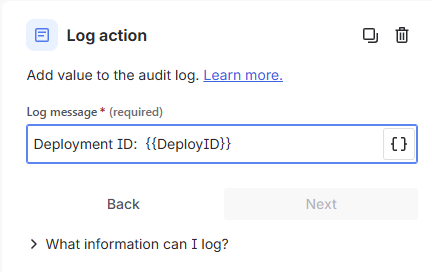
Log message:
Deployment ID: {{DeployID}}
4. Send Web Request: Delete the Deployment to Rollback
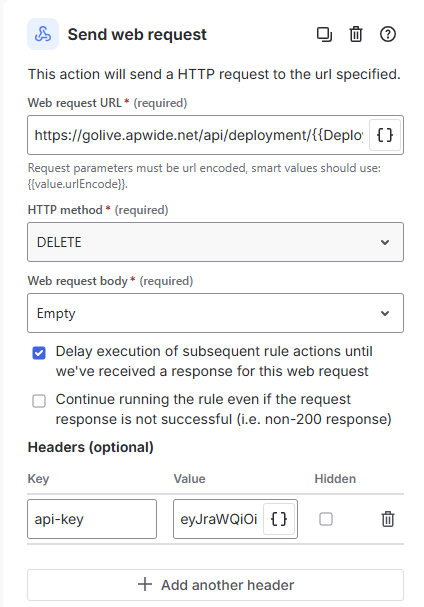
Web request URL:
https://golive.apwide.net/api/deployment/{{DeployID}}
“api-key” header: paste the previously generated Golive API Token
Need Assistance?
For support with integrating Golive and Jira Automation, reach out to our Customer Portal.