This guide explains how to add one or more Tiers to an existing Environment, turning it into an Environment Landscape, and how to visualize Tiers in Environment Views. For detailed information about Environment Landscapes, refer to the Environment and Application Landscapes article.
Info
If you’re looking to create a brand-new Environment with tiers, refer to the Create Environments Landscapes article.
Add Tiers to an Environment
Requirements
-
You must have Manage Applications permission in order to modify the Application settings. To
learn more about permissions, refer to the Security & Permissions documentation. -
You have an existing Environment that currently has no Tiers.
Step 1: Open Application Settings
In order to add Tiers to an Environment, you must first configure your Application:
-
Access the Environment Details page of the Environment related to the Application.
-
Click the Application Settings button.
Step 2: Set up Application Tiers
-
Go to the Application Tiers tab. For more details about Application settings, refer to the Manage Applications documentation.
-
Use the search bar at the bottom to add Tiers to the current Application.
Tip
If the Tier you need isn’t listed, click + Create new tier.
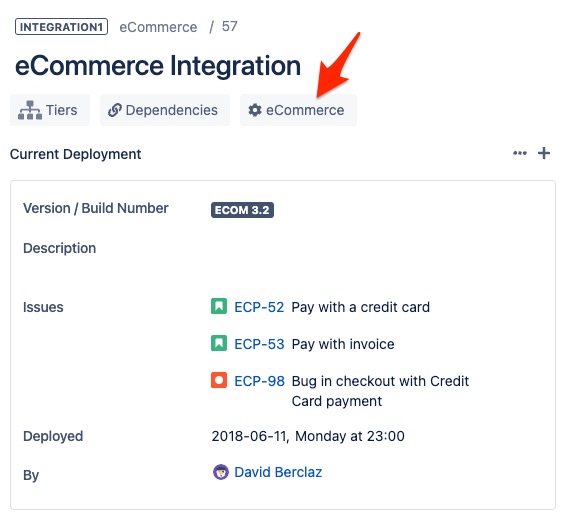
Step 3: Add the First Tier to an Environment
-
Go to the Environment Details page for the target Environment.
-
Click the Add tier button or scroll to the Tiers section.
-
Click + (Add tier).
-
Follow the on-screen instructions to create the new Tier. The steps are the same as when creating Environments.
The new Environment will be added as a Tier.
Tip
You can also use the Guess tiers feature to automatically populate Tiers based on the Application configuration.
Step 4: Manage Tiers
Use the Tiers section to view, edit, or add more Tiers:
-
Click the Tier Name to update it.
-
Click the Tier Status to change it.
-
Click the Tier Version to modify it.
-
Click the Actions button (three vertical dots) next to a Tier to:
-
Open
-
Clone
-
Unlink
-
Delete
-
Info
Unlinking a Tier does not delete it. The Tier remains available and can be relinked using the + (Add Tier) button in the Tiers section. You won’t need to recreate it.
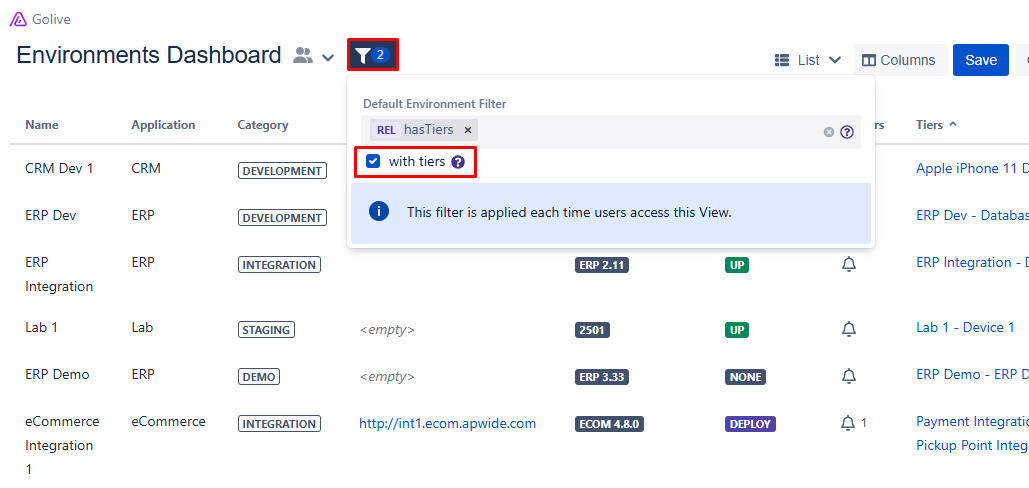
View Tiers using Environment Filters
Requirements
You must have one of the following permissions:
-
Browse Environments
-
Any higher permission that includes Browse
-
Golive Administrator
For details, refer to the Security & Permissions documentation.
Steps
To filter Environments that include Tiers:
-
Click the Environment Filter icon (funnel).
-
Add the hasTiers filter.
-
Select the with tiers box.
Info
To learn more about advanced Environment Filters options, refer to the Search Environments article.
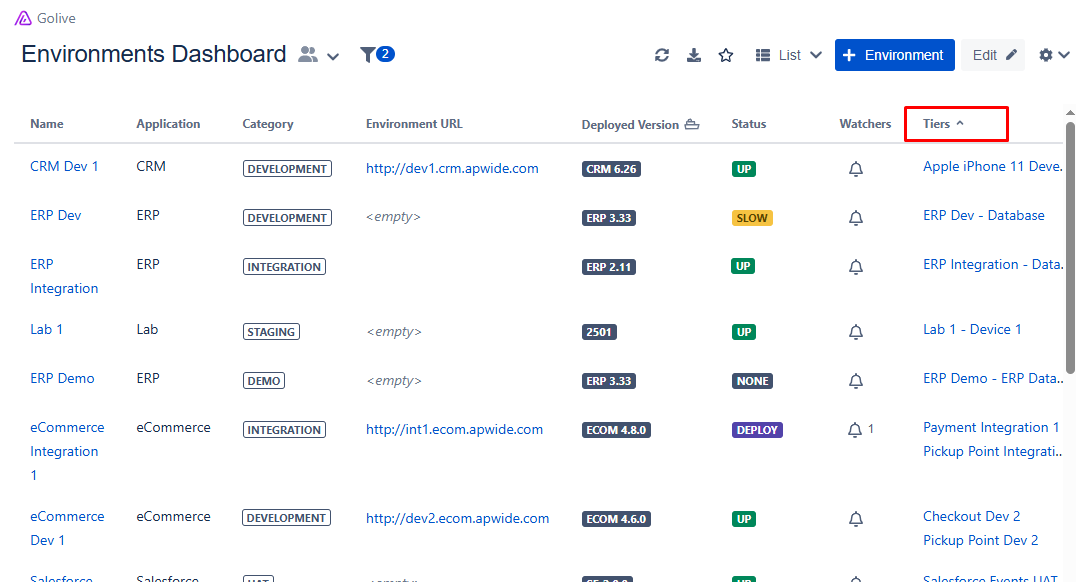
View Tiers in the Environment List View
Requirements
You must have one of the following permissions:
-
Edit Environments or Create and Delete Environments
-
Golive Administrator
Steps
To display Tier data in the Environment List:
-
Go to the Environment List view.
-
Click Edit to enter edit mode.
-
Click Columns.
-
Search for and select Tiers.
-
Click Save.
The Tiers column will now be visible, allowing you to quickly browse Environments and their associated Tiers.