
In this guide, you'll learn how to configure Jira Automation and Golive to automatically deploy a Jira version to a selected Environment once an Environment Change booking is successfully completed.
This setup helps release managers automate deployments directly from Jira bookings, eliminating the need for a separate “Deployment Request” issue. It’s ideal for organizations using Golive Scheduling functionality to plan and execute environment changes.
Understand the Solution
Some teams prefer to use Jira to schedule Environment changes and manage deployments directly from those bookings — without creating an extra “Deployment Request” issue type.
This automation enables you to trigger deployments automatically once an Environment Change ticket of type Release is completed. The process retrieves the version information and deploys it to the selected Environment in Golive.
Unlike the standard Use Jira Tickets to Drive Deployments setup, this approach:
-
Uses the existing Environment Change issue type created during Golive setup.
-
Allows specifying any version from any Jira project using custom fields.
-
Deploys automatically when the environment booking is marked as Finished.
Requirements
-
Golive Cloud installed on Jira Cloud.
-
Environment Scheduling configured in Golive.
-
Admin permissions to create and modify issue types, workflows, and automation rules.
Info
This configuration was tested on Jira Cloud, but should also work on Jira Data Center.
Configuration Overview
You will use the existing Environment Change issue type and add three new fields:
|
Field Name |
Type |
Purpose |
|---|---|---|
|
Change Type |
Select List (single choice) |
Must include Release as one option. |
|
Version To Deploy |
Short Text |
Used to specify the version name to deploy. |
|
Project of Version To Deploy |
Project Picker |
Identifies which Jira project contains the version. |
After adding these fields, you’ll create one Jira Automation Rule that:
-
Triggers when an Environment Change booking of type Release transitions to Finished.
-
Retrieves the version and Environment details.
-
Deploys the version to the target Environment in Golive.
-
Optionally adds a comment with deployment details.

Configuration Steps
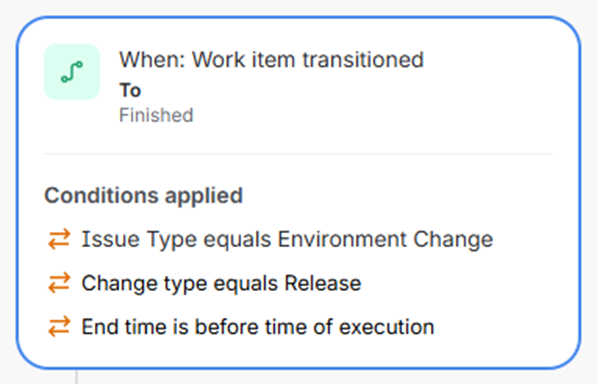
Step 1: Define the Trigger
Choose an event that starts the automation — for example, when an Environment Change transitions to Finished and the Change Type is Release.
You can define these conditions in the trigger itself or as a separate condition step.
Step 2: Send Web Request – Get Version ID
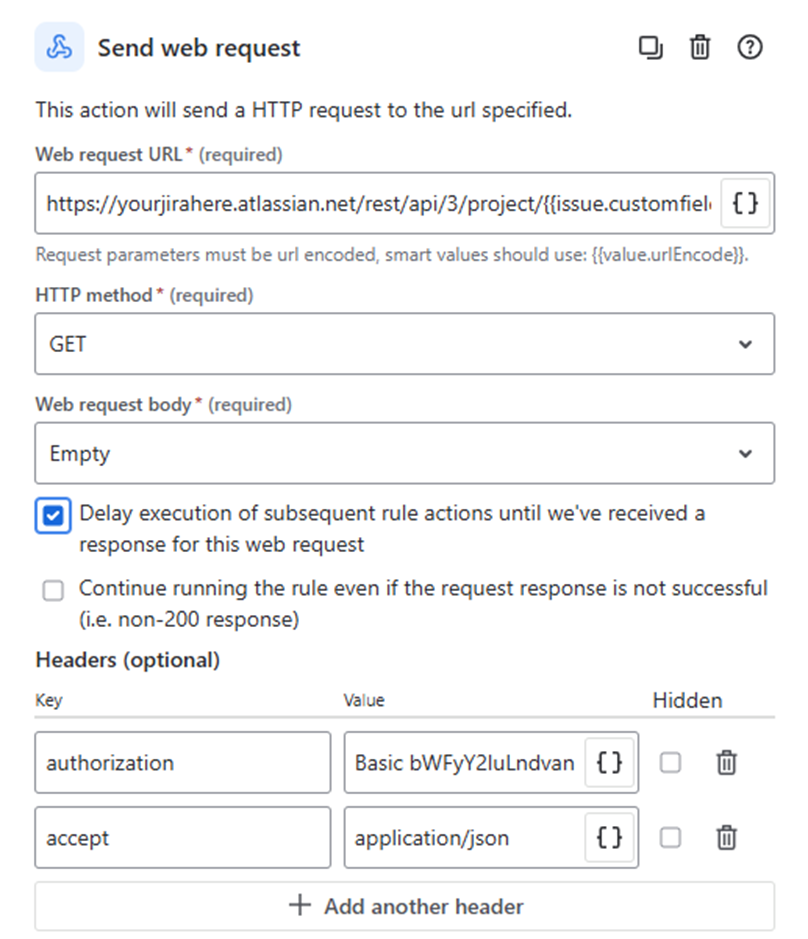
Web request URL:
https://yourjirahere.atlassian.net/rest/api/3/project/{{issue.customfield_10751.key}}/version?orderBy=name&maxResults=1&query={{issue.customfield_10718.urlEncode}}
Update accordingly:
-
yourjirahere: Replace with your Jira instance URL. -
customfield_10751: Replace with the ID of the Project of Version To Deploy field. -
customfield_10718: Replace with the ID of the Version To Deploy field.
Headers:
Authorization: Basic <base64-encoded-email:api-token>
Make sure the user has permissions to access the project that contains the version.
Enable the option to delay subsequent rule actions until the response is received.
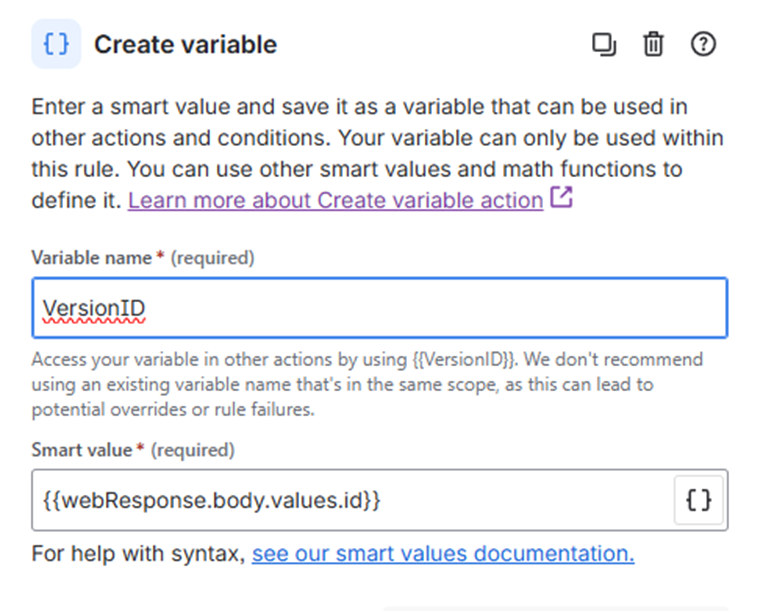
Step 3: Create Variable – Version ID
|
Variable Name |
Smart Value |
|---|---|
|
VersionID |
|
Step 4: Send Web Request – Get Target Environment ID
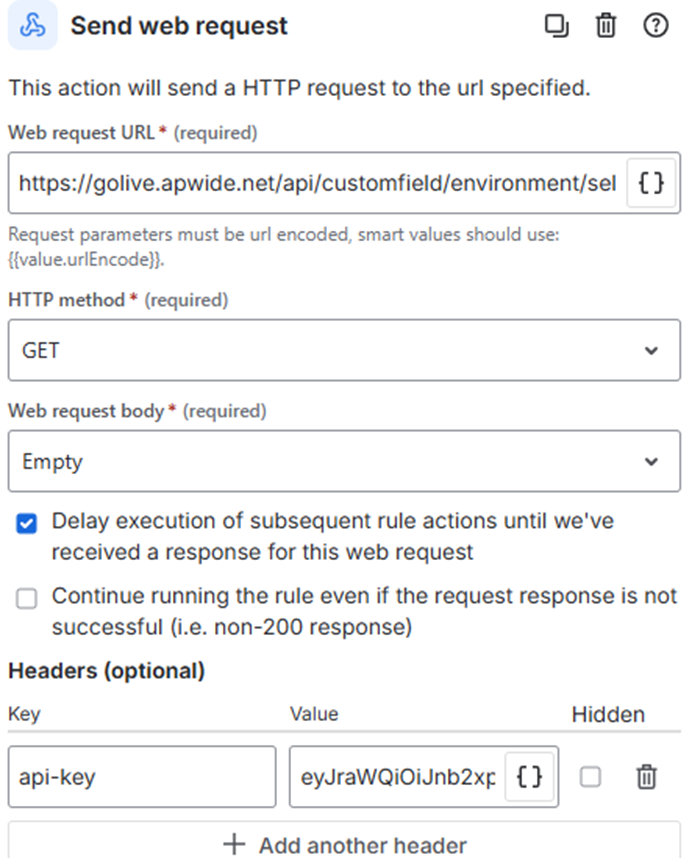
Web request URL:
https://golive.apwide.net/api/customfield/environment/selected?issueKey={{issue.key}}&customfieldId=customfield_10487
Update accordingly:
-
customfield_10487: Replace with the ID of the Environments field in your Jira instance.
Header:
Generate a Golive API Token and paste it as value.
api-key: <your Golive API Token>
Enable the option to delay next actions until the response is received.
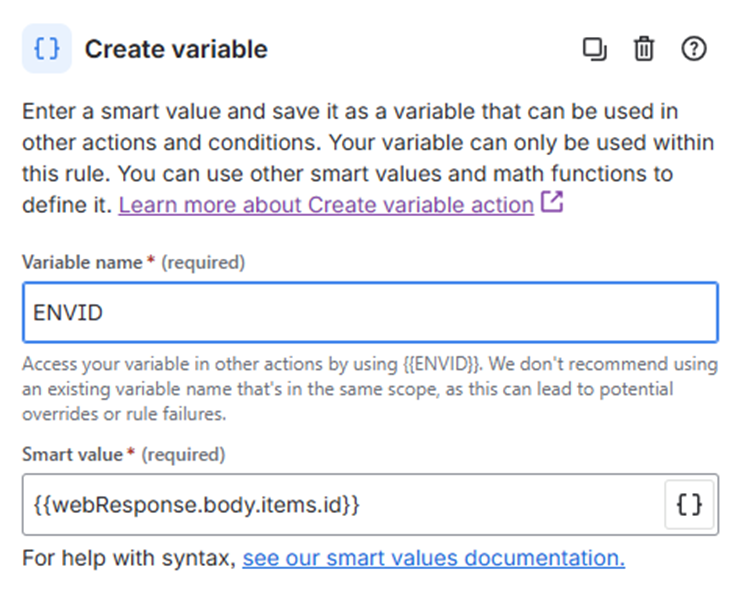
Step 5: Create Variable – Environment ID
|
Variable Name |
Smart Value |
|---|---|
|
ENVID |
|
Step 6: Send Web Request – Deploy Version to Target Environment
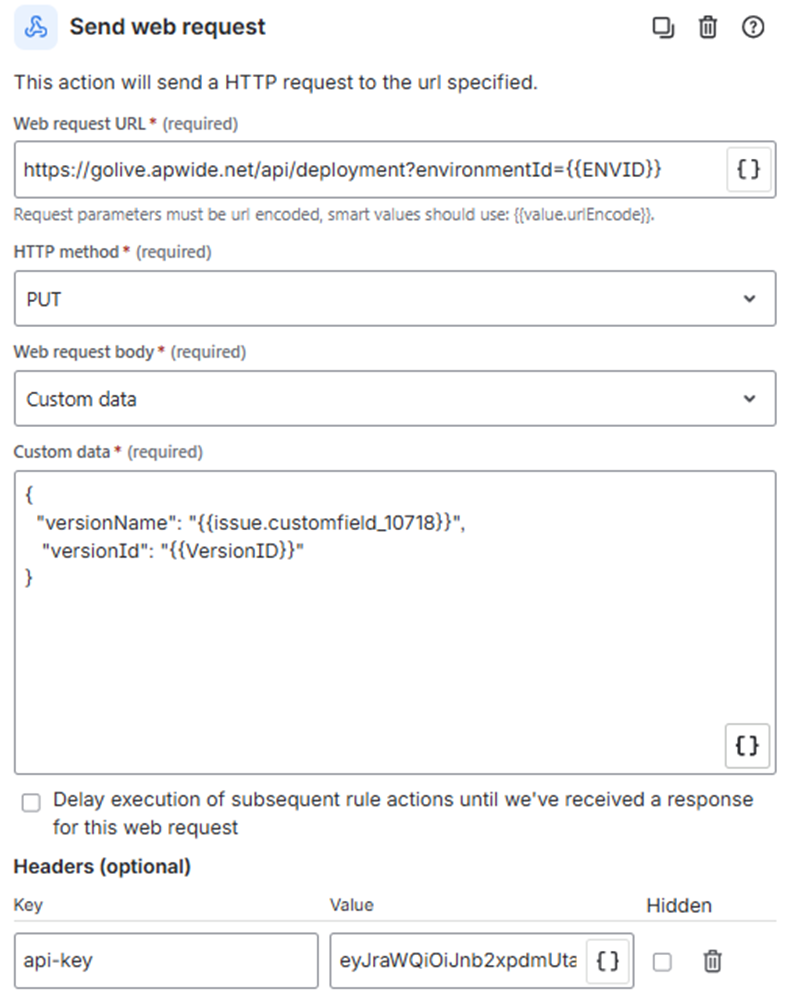
Web request URL:
https://golive.apwide.net/api/deployment?environmentId={{ENVID}}
Custom Data:
{
  "versionName": "{{issue.customfield_10718}}",
  "versionId": "{{VersionID}}"
}
Header:
Generate a Golive API Token and paste it as value.
api-key: <your Golive API Token>
Update accordingly:
-
Replace
customfield_10718with your field ID for Version To Deploy.
Step 7: Add Comment (Optional)
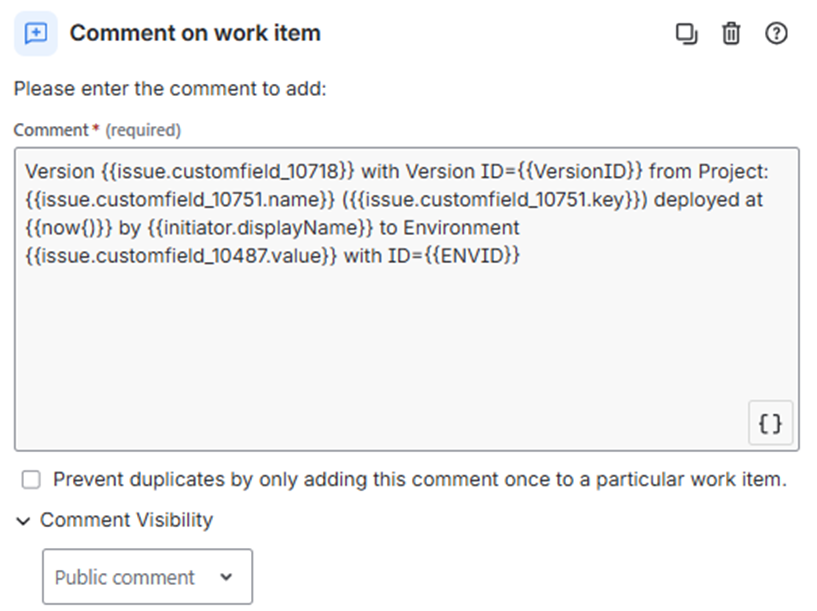
Add a comment for tracking purposes.
Comment content:
Version {{issue.customfield_10718}} with Version ID={{VersionID}}
from Project: {{issue.customfield_10751.name}} ({{issue.customfield_10751.key}})
deployed at {{now}} by {{initiator.displayName}}
to Environment {{issue.customfield_10487.value}} with ID={{ENVID}}
Update accordingly:
-
Replace each
customfield_XXXXXwith your actual field IDs.
Key Differences from “Use Jira Tickets to Drive Deployments”
|
Standard Setup |
Automatic Deployment Setup |
|---|---|
|
Uses a separate Deployment Request issue type. |
Uses the existing Environment Change issue type. |
|
The deployed version must belong to the same project as the deployment request. |
Any version from any Jira project can be specified. |
|
Deployment occurs after transitioning the request to Done. |
Deployment occurs automatically when the environment booking is marked Finished. |