Working with Events and Calendars in a Timeline
In this article, you'll learn how to create and schedule events, navigate time, use quick filters, interact with the Calendars panel, and manage permissions within a Timeline. For more information on the core concepts and components of the Timeline, refer to the Timeline Core Concepts article.
Creating and Scheduling Events
You can create a new event in the Timeline using two methods: Dragging and Dropping or Using the Calendars Menu.
1. Dragging and Dropping
Access the Timeline where you want to add an event.
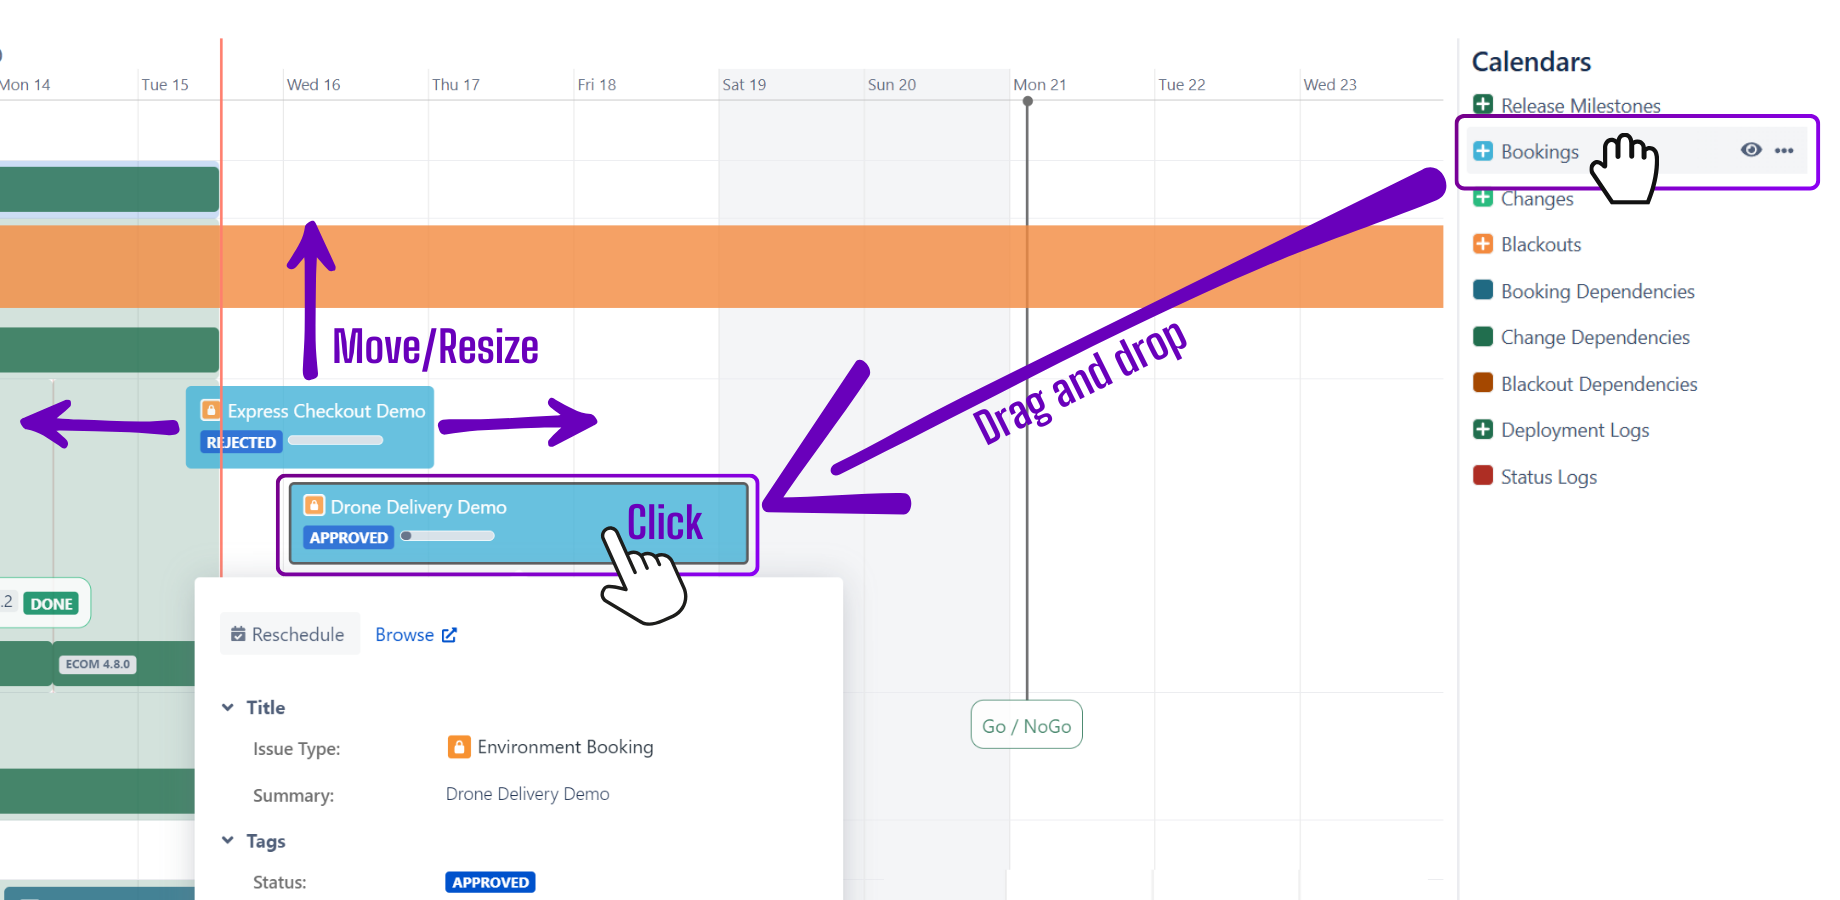
In the Calendars section on the right side of the screen, drag the desired Calendar and drop it onto the timeline at preferred time and date.
The event’s start and end times will be automatically pre-filled based on where you dropped the event and your current zoom level.
2. Using the Calendars Menu
Access the Timeline where you want to add an event.
In the Calendars section, click on the desired Calendar to create an event.
Info
Alternatively, click the Calendar Actions button (three horizontal dots) and select Create Event.
By choosing this method, you'll have to manually enter the event’s Start and End times.
Time Navigation
You can navigate through the Timeline and adjust the visible date range using your mouse, trackpad, or the Timeline toolbar.
Tip
For automatic date range settings, refer to the Timeline Date Range Settings article to learn how to automatically set the visible date range relatively to current time.
.png%3Falt=media?inst-v=754f5f79-0176-490e-b66a-65f43381027d)
Filtering Events
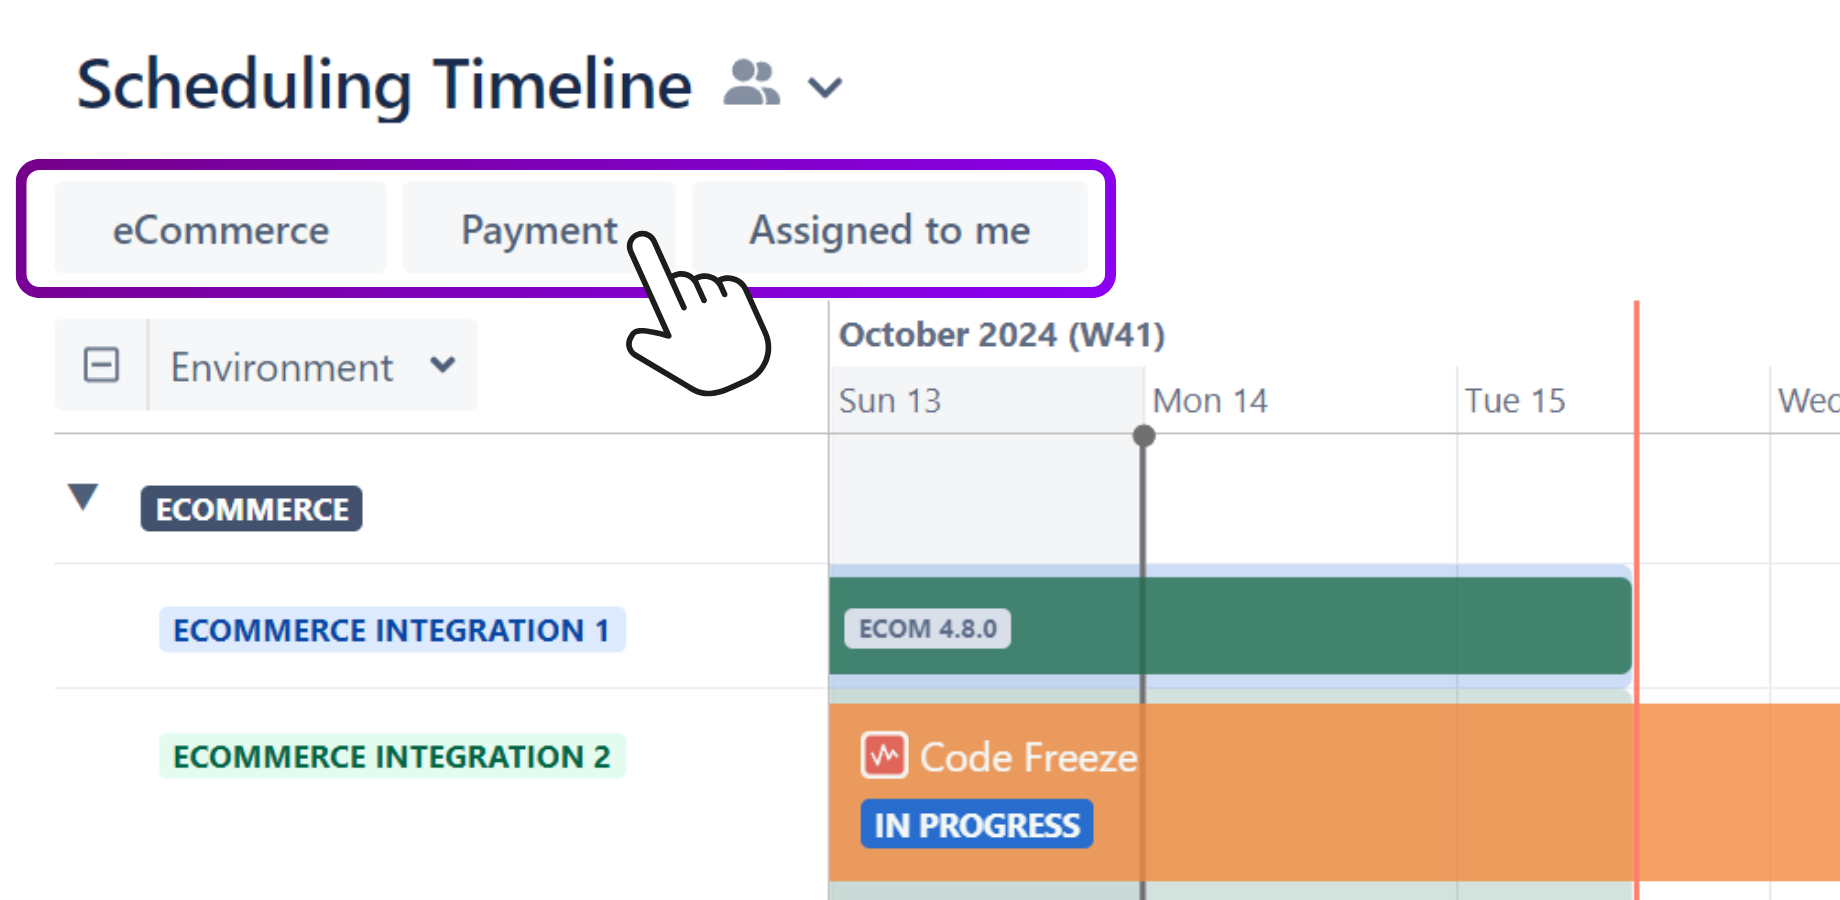
You can filter events displayed on the Timeline by using Quick Filters found under the View Browser.
Creating Quick Filters
To create Quick Filters in Timeline Views, you must be one of the following:
A Golive Administrator.
A Timeline Owner.
Steps
Click Edit to enter edit mode.
Click the funnel icon located under the timeline name.
Choose the relevant filters from the following options:
Environments
Projects
Issue Statuses
Issue Resolutions
Versions
Version Statuses
Tip
For additional filtering criteria, click the + More button to expand the options..
Calendars Menu
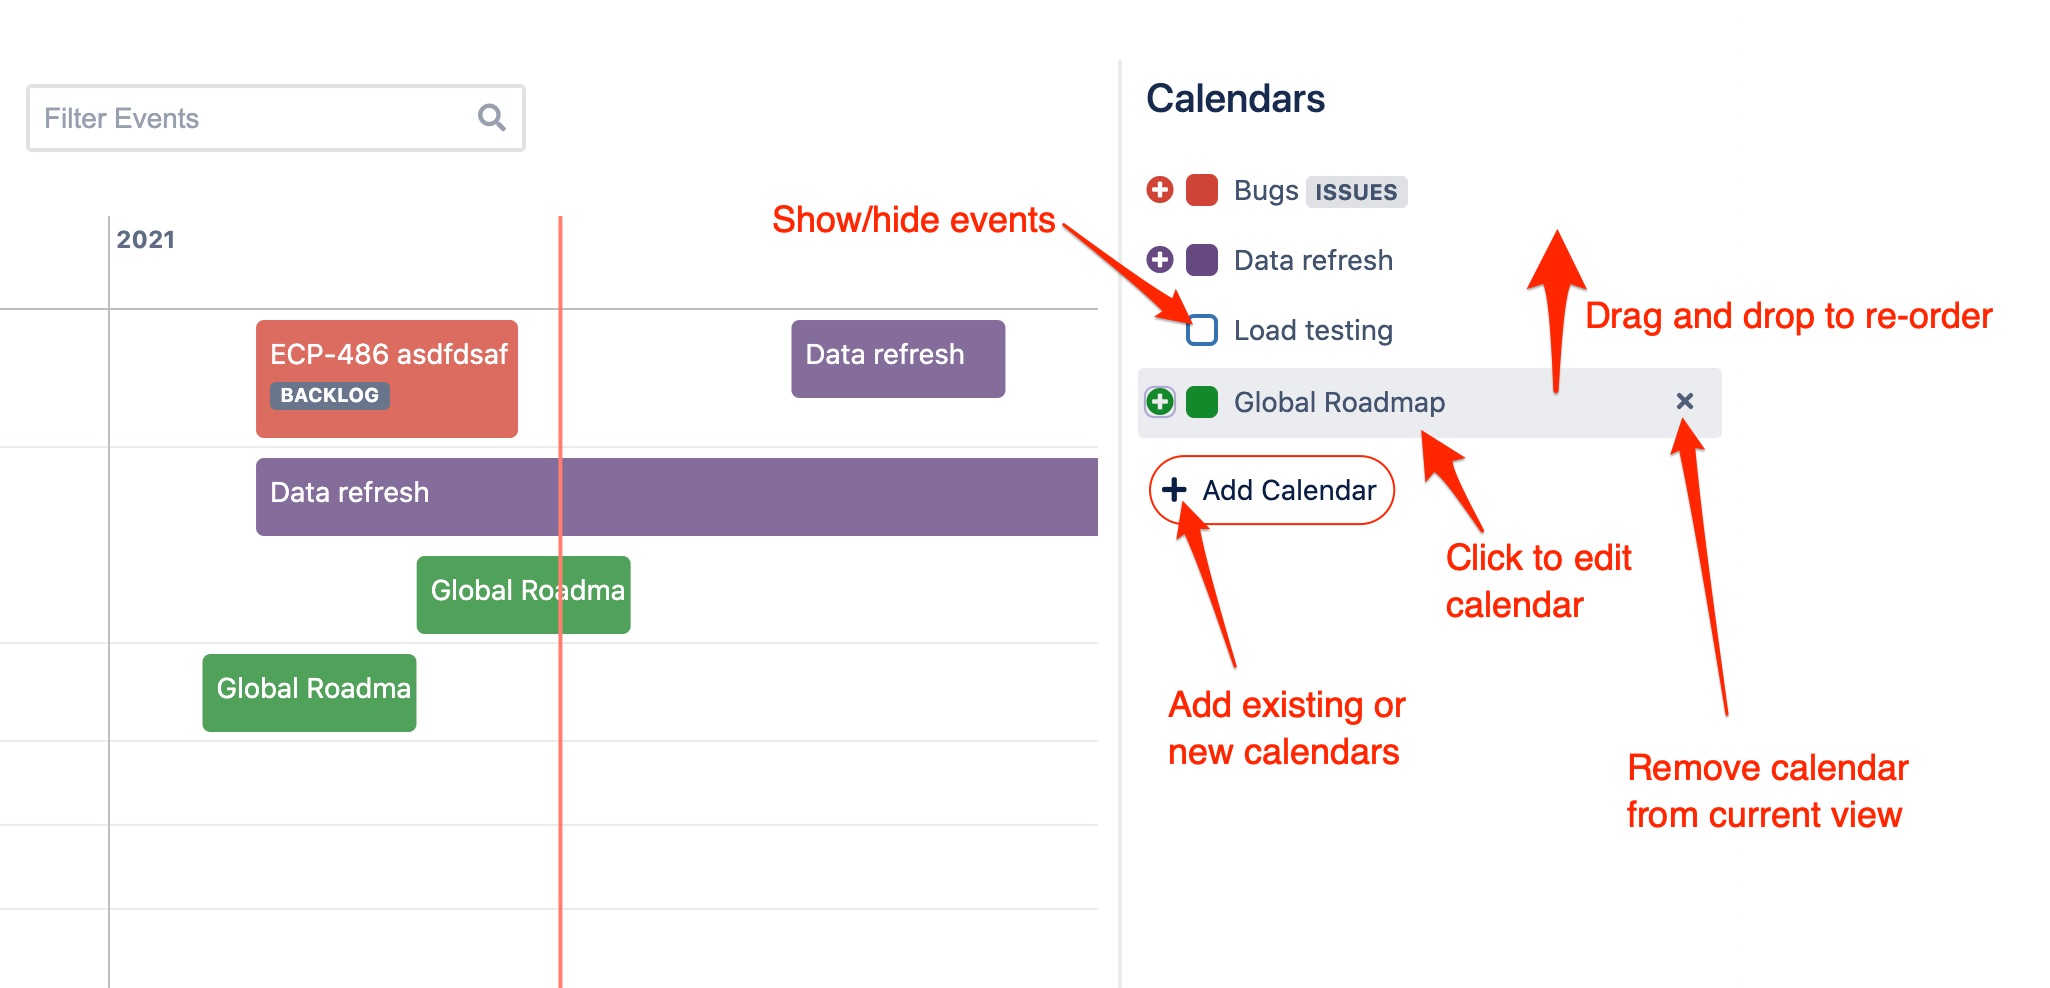
Use the Calendars Menu on the right side of your Timeline to manage Timeline calendars.
Available Options
Create Events: Use the drag-and-drop function or click the calendar to create a new event.
Show/Hide: Click the eye icon to display or hide events for a specific calendar.
Actions Menu: Click the three vertical dots next to the calendar to open the following options:
Create Event: Create a new event on the Timeline.
View/Edit: Open the Calendar Details dialog to view or modify calendar details.
Info
If you cannot change settings of a given Calendar you may not have sufficient permissions.
Specific Settings for different types of calendars
For detailed information about each one of the Calendar types, refer to the following articles:
Sharing a Calendar
When you create a Calendar, it's only visible within its current timeline. To reuse a calendar in multiple timelines, you’ll need to share it.
Requirements
To share a calendar, you must have one of the following permissions:
Manage Calendars
Create Shared Calendar
For detailed information about permissions, refer to the Security & Permissions and article.
Steps
Access the desired Timeline.
In the Calendars Menu on the right, locate the Calendar you want to share.
Click the Actions button (three horizontal dots) next to the calendar.
Select View/Edit.
In the Calendar Details dialog, click the Share button (represented by an arrow).
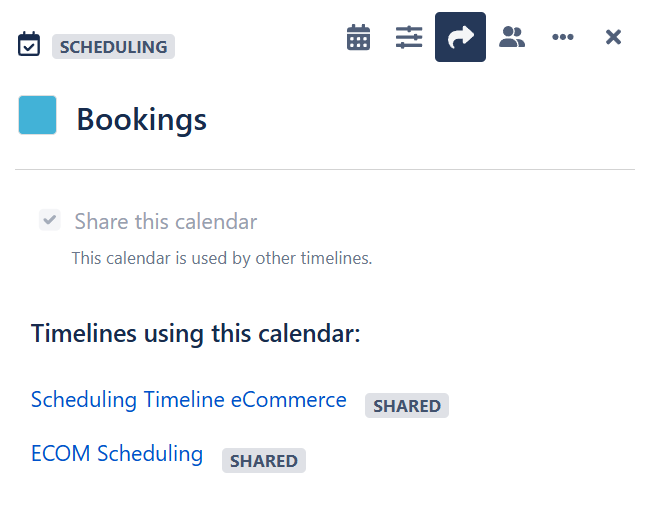
Check the Share this calendar box.
Click Done.
Setting Calendar Permissions
Requirements
To share a calendar, you must have one of the following permissions:
Calendar ADMIN permission.
Timeline Owner.
For detailed information about permissions, refer to the Security & Permissions and article.
Steps
Access the desired Timeline.
In the Calendars Menu on the right, locate the Calendar you want to share.
Click the Actions button (three horizontal dots) next to the calendar.
Select View/Edit.
In the Calendar Details dialog, click the User Groups and Permissions button (represented by two users).
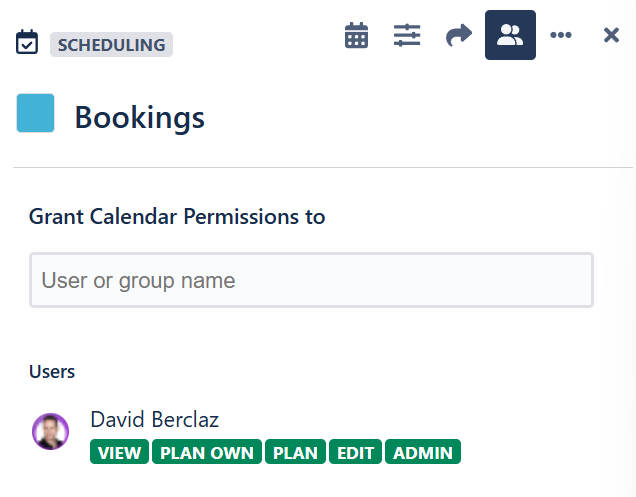
Use the search bar to grant Calendar Permissions to Users or Gorups.
Click Done.
Calendar Permission Types
Permission Type | Description |
|---|---|
VIEW | Users can see events and use the calendar in read-only mode for their timelines. |
PLAN OWN | Users can add, remove, and edit events they created themselves. |
PLAN | Users can add, remove, and edit any events on the calendar. |
EDIT | Users can change calendar settings, except for permissions. |
ADMIN | Users have full control, including setting permissions and deleting the calendar. |
Info
Jira users with global Manage Calendars or Golive Administrator permissions can view and manage all Calendars without restriction. Also, Jira users with global Plan Events permissions can plan events from all Calendars without restriction.
These global permissions are stronger than permissions defined at Calendar level.
