
Learn how to use Dynatrace to automatically update the status of your Golive environments.
Integrate Golive with Dynatrace Synthetic Monitoring
In this section, you will learn how to configure Dynatrace in order to automatically update the status of Golive environments when a problem is opened or resolved by Dynatrace.
Learn more about Dynatrace Synthetic Monitoring
Before going further, please ensure that you have installed version 9.8.0 (or higher) of Golive.
If you do not have an existing Dynatrace account, you can create a free Dynatrace account
Connect Dynatrace with Golive
Dynatrace will be the master system in charge to notify Golive when an environment is up or down. In order to do that, we must setup an integration between Dynatrace and the Golive Rest API.
STEP 1 Create a new “Problem notification”
From the Dynatrace menu, go to Settings > Integration > Problem notification
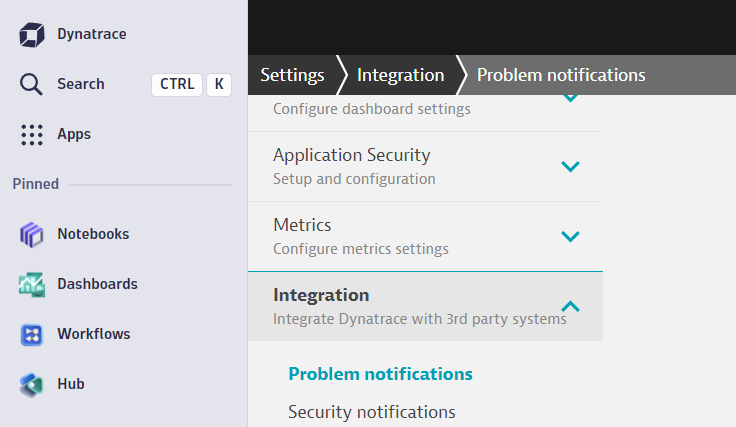
Click the “Add notification” button:

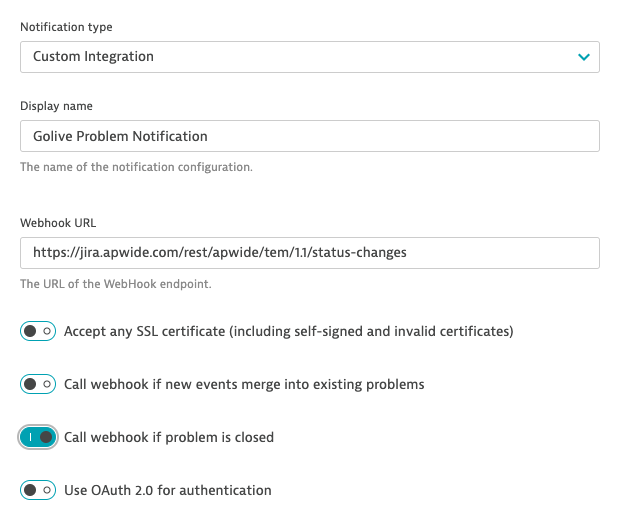
STEP 2 Configure name and endpoint
Choose a name and set the endpoint with this value:
https://{{jira.your-company.com}}/rest/apwide/tem/1.1/status-changes
N.B. replace “{{jira.your-company.com}}” by the base url of the Jira instance where Golive is installed
Your configuration should looks like that:
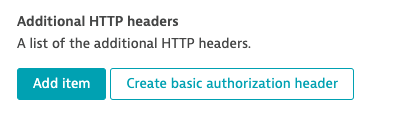
STEP 3 Prepare and set the authorization token
-
In section “Additional HTTP headers”, click on “Create basic authorization header” button:
-
enter the user/password you want to use to connect to your Jira and Golive API
-
your token configuration should look like that:
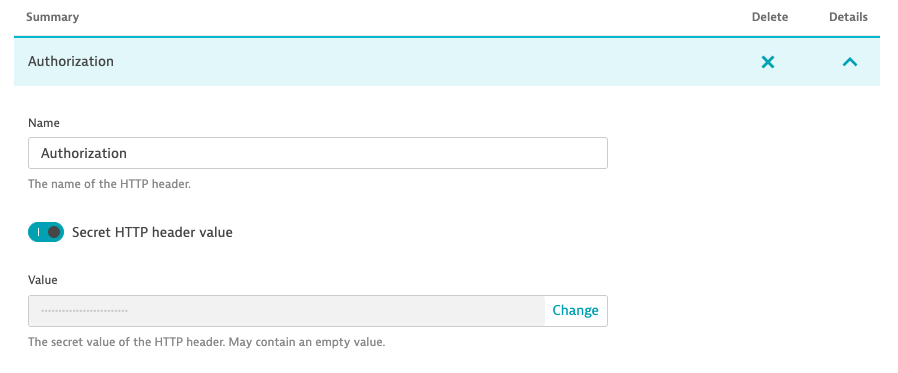
Golive REST api use the same authentification engine as Jira: Basic authentication.
Here is another good tutorial explaining how it works and how you can easily generate basic authentication tokens.
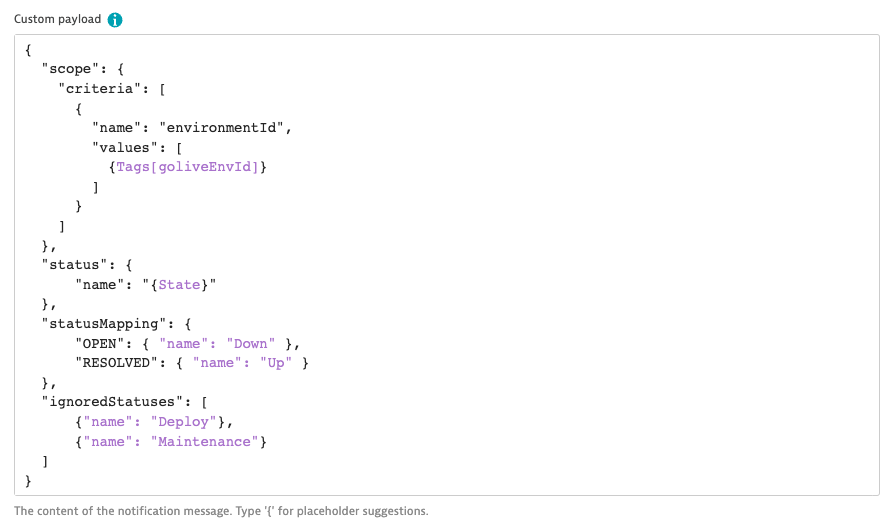
STEP 4 Configure the custom payload
Copy/Paste this payload into “Custom payload”:
{
  "scope": {
    "criteria": [
      {
        "name": "environmentId",
        "values": [
          {Tags[goliveEnvId]}
        ]
      }
    ]
  },
  "status": {
      "name": "{State}"
  },
  "statusMapping": {
      "OPEN": { "name": "Down" },
      "RESOLVED": { "name": "Up" }
  },
  "ignoredStatuses": [
      {"name": "Deploy"},
      {"name": "Maintenance"}
  ]
}
Ensure that these 2 environment statuses exist in Golive:
-
“Up”
-
“Down”
Or replace “Up” and “Down” in the code snippet by your custom statuses.
Your configuration should look like that:
STEP 5 Assign your integration to an Alerting Profile
Choose to which alerting profile should be used to notify Golive:

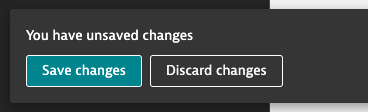
STEP 6 Save your changes
Do not forget to save your changes:
Set the monitoring of an Environment
STEP 1 Create a new Golive Environment and get its ID
Connect to Golive and create a new Golive environment that you will use to test this integration.
Learn how to create a new environment here: Clone and Delete Environments
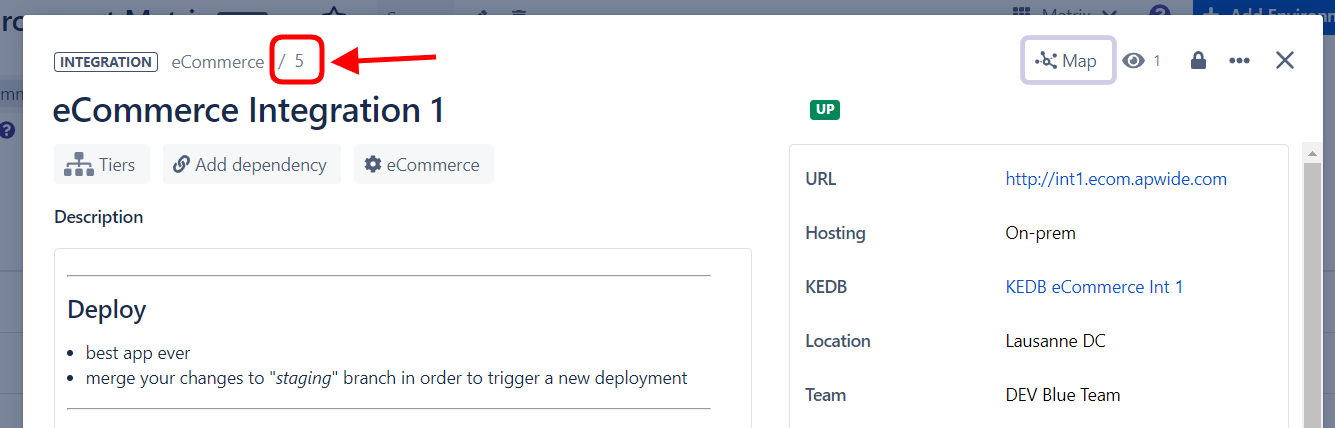
Memorize the ID of the environment that you want to use to test this integration.
In our current example, the ID is 5.
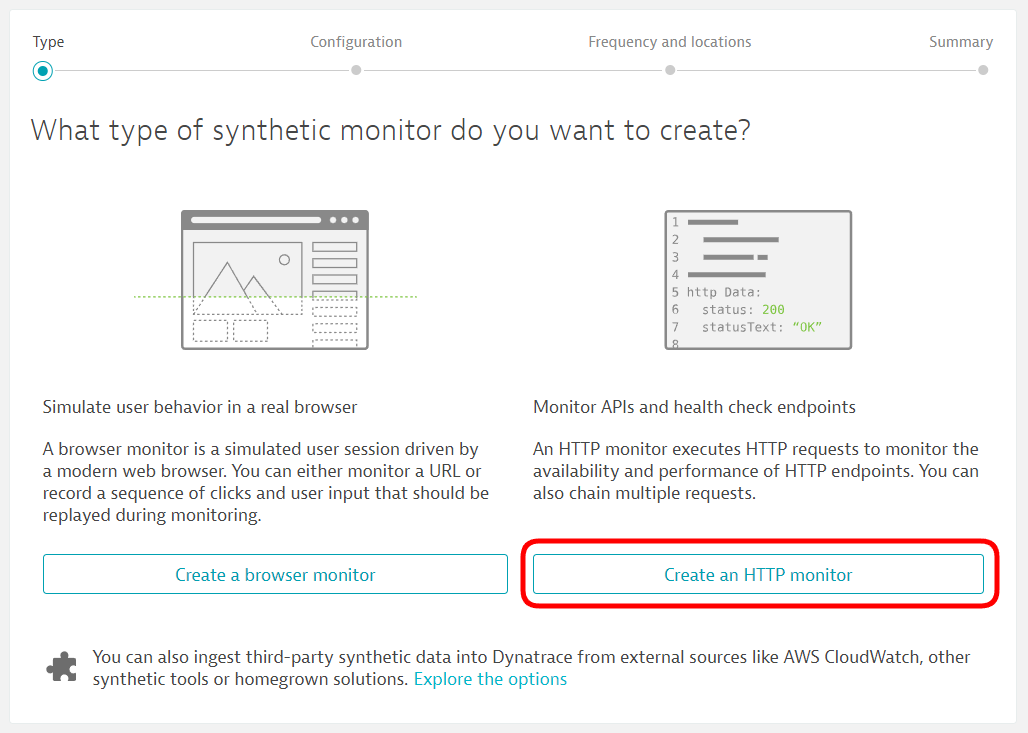
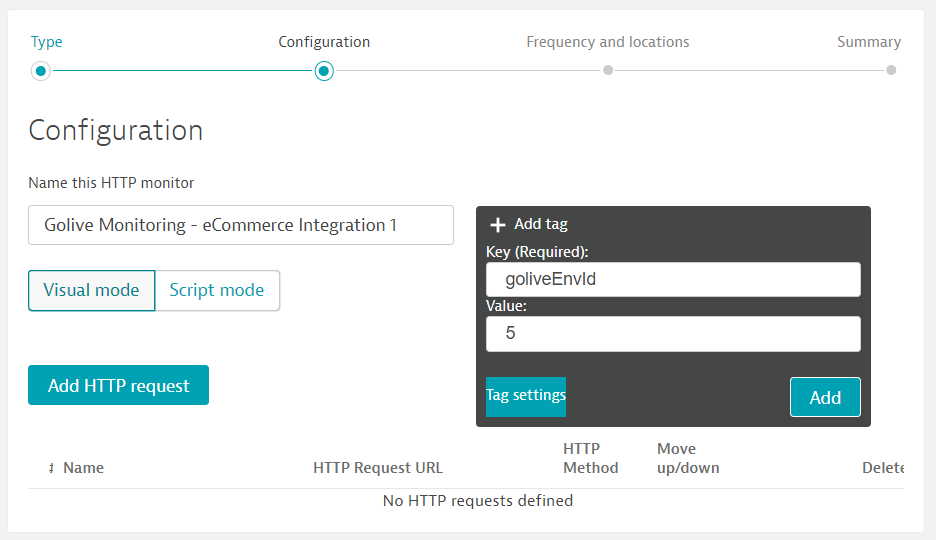
STEP 2 Create a new Synthetic Test
From the Dynatrace menu, go to Synthetic > Create a synthetic monitor > Create an HTTP monitor
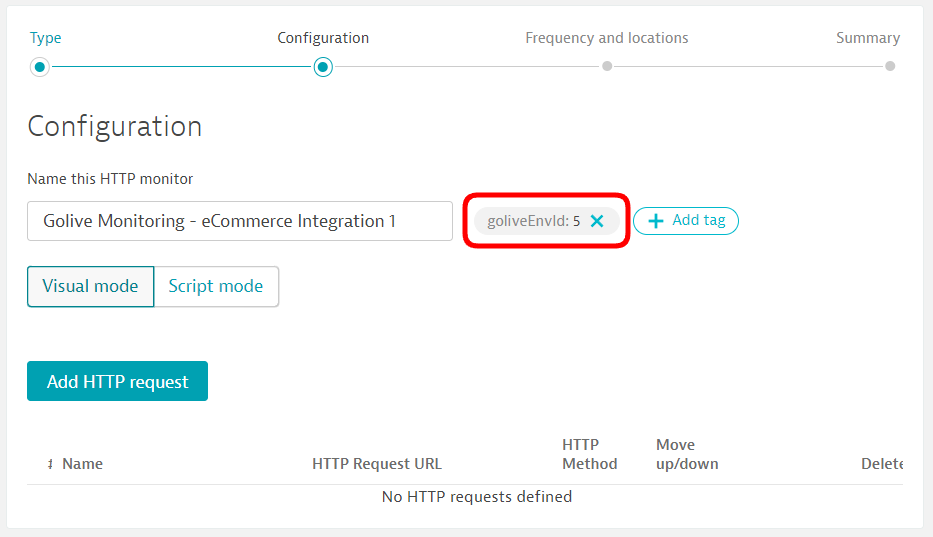
Choose a name for your HTTP monitor and add a tag:
-
Key: goliveEnvId
-
Value: the ID of the Golive environment to monitor
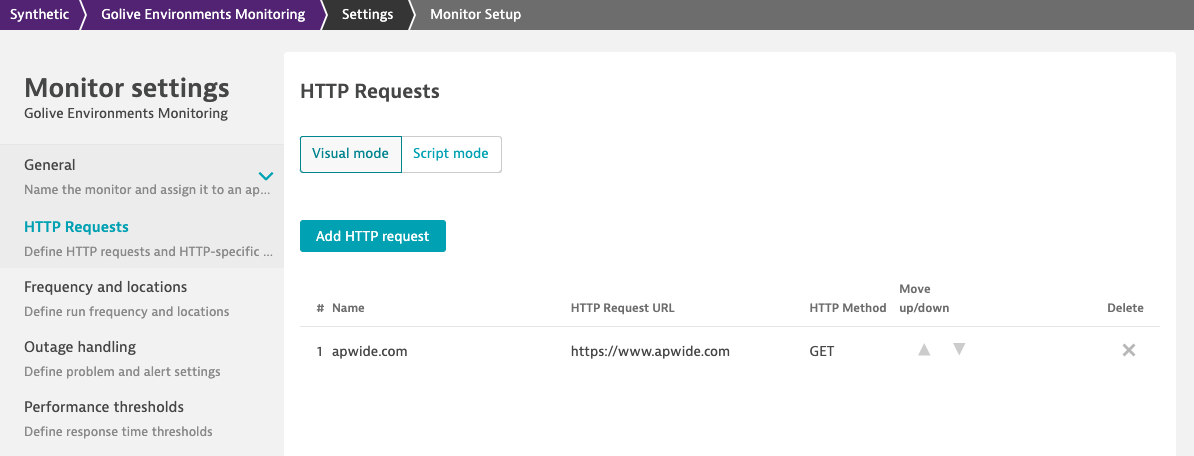
STEP 3 Add HTTP request
Click on “Add HTTP request” button:

Set the endpoint that should be monitored:
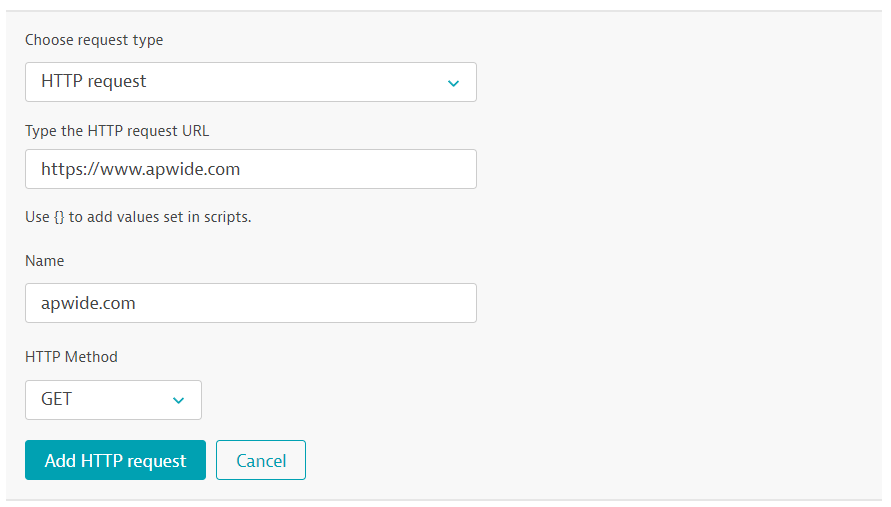
Click on “Add HTTP request” button:

Click on “Next” button:

STEP 5 Select locations
Select locations you want to use to call your endpoint:
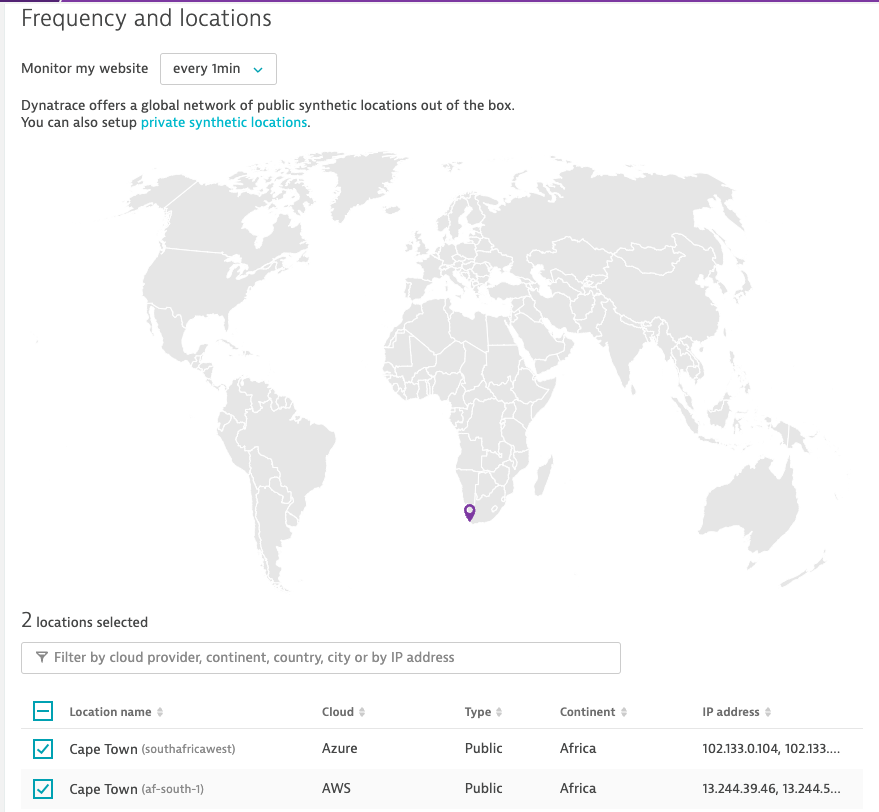
If you want to test an environment that is not reachable from Internet, you should configure a Private Synthetic location.
Click on “Next” button:
Click on “Create HTTP monitor” button:
You have successfully configured your monitoring!
You can repeat these steps to create synthetic tests for each of your Golive Environments.
Test your monitoring
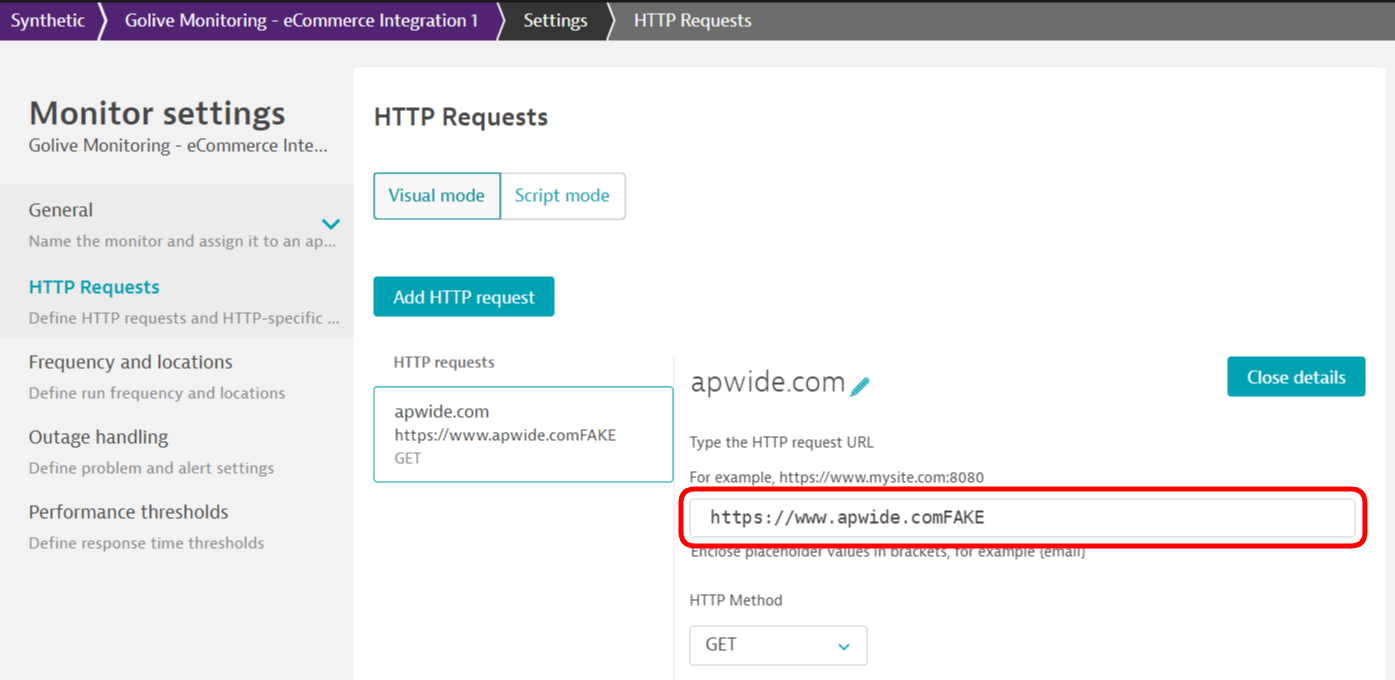
Select the Synthetic monitoring you want to test and click on “Edit”:

Replace the right URL by a fake one:
Save your changes:
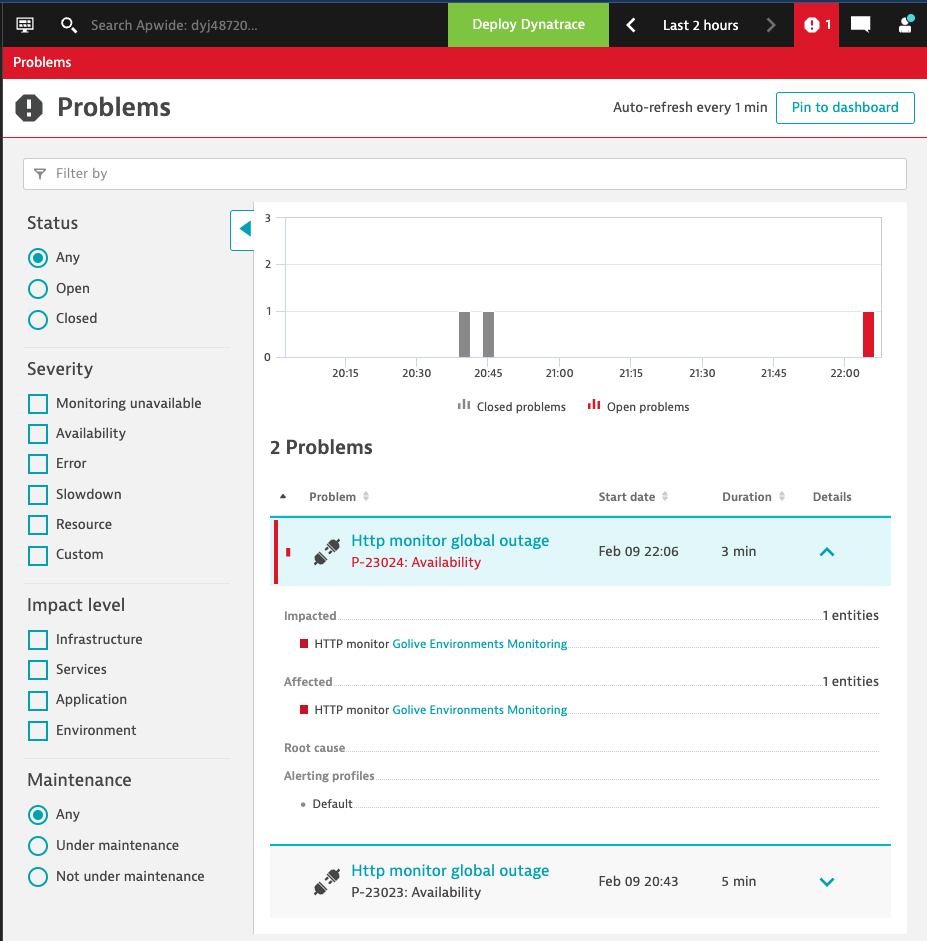
Wait for 1 to 5 minutes, the monitoring should fail and a problem should be raised:
Connect to Golive and confirm that the status of your environment is “Down”.
Put back the correct URL:
Save your changes:
After 1 to 5 minutes:
-
The problem in Dynatrace should be resolved
-
The status of your environments should be “Up” again in Golive
Well done, time for a coffee break!