
In this guide, you’ll learn how to use Jira Automation and Golive to automatically populate the Approvers field in Jira work items using the approvers defined in the respective Golive environment.
This setup retrieves approver names stored as a Golive Environment Attribute and maps them to Jira users, ensuring that bookings, changes, or blackouts always include the correct approvers without manual input.
Requirements
-
Golive Cloud installed on Jira Cloud
-
Approvers attribute configured on Golive Environments:
-
Markdown type
-
Jira user names or user e-mail addresses matching records in Jira as a comma separated value list
-
-
Admin permissions to create or modify Jira Automation rules
-
A Jira work type for bookings / changes / blackouts with:
-
Environments field
-
Approvers field available on the screen
-
Configuration Overview
You'll configure one Jira Automation rule that performs the following actions when a work item is created:
-
Fetches the list of Approvers from Golive
-
Splits the Approver List into individual values
-
Resolves each approver to a Jira User ID
-
Adds each user to the Jira Approvers field
-
Logs values for traceability
-
Adds a comment for verification
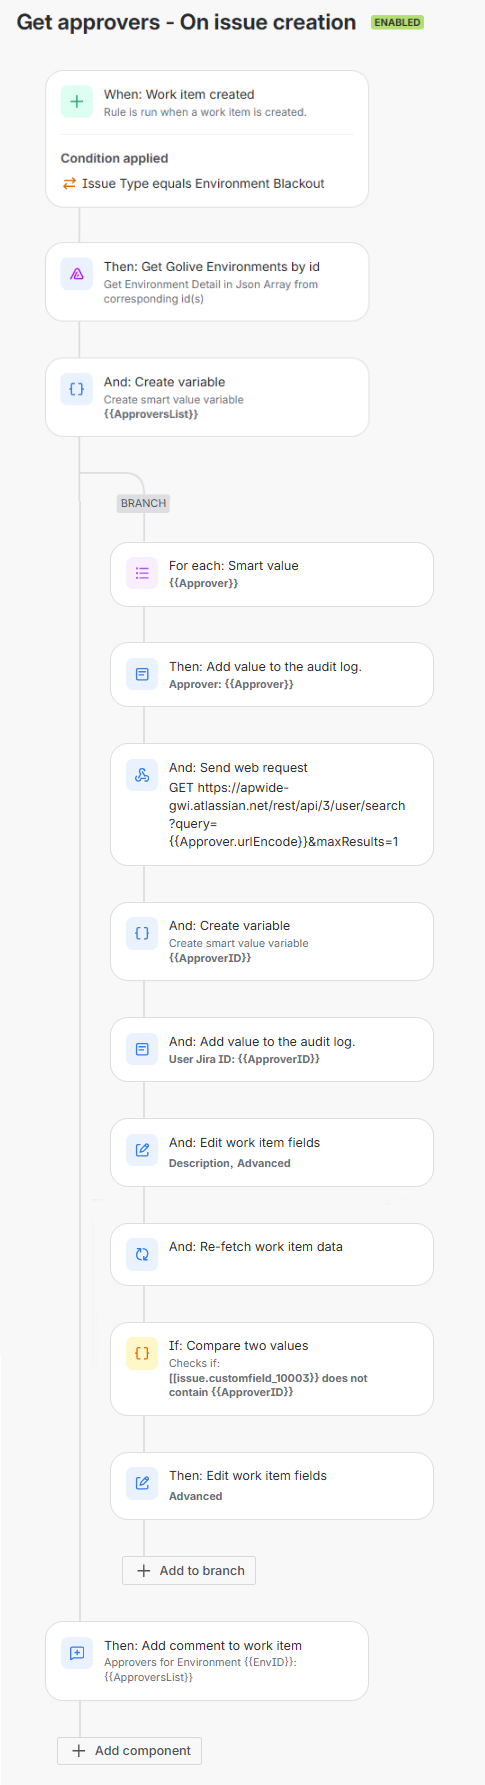
Configuration Steps
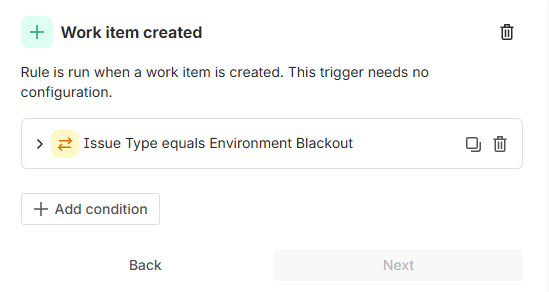
Step 1: Define the Trigger
Trigger: Work item created
Configure the rule to trigger on creation of the relevant work type.
You can add additional conditions if required (e.g. narrow down to specific work type).
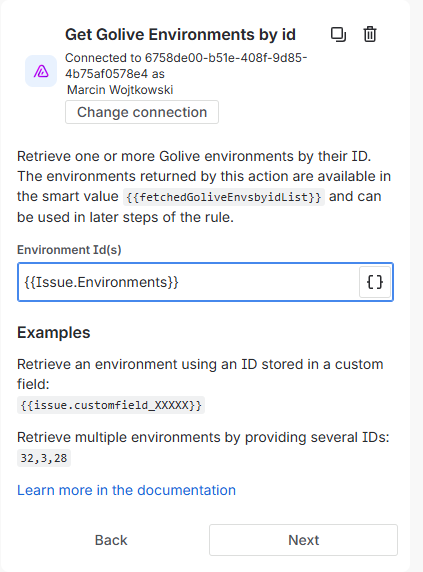
Step 2: Retrieve the environments properties from Golive
This request retrieves Environment Properties and Attributes for selected environments, including the Approvers attribute.
Step 3: Create Variable – Approvers List
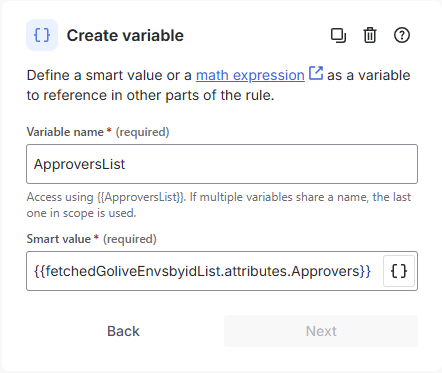
Variable name: ApproversList
Smart value:
{{fetchedGoliveEnvsbyidList.attributes.Approvers}}
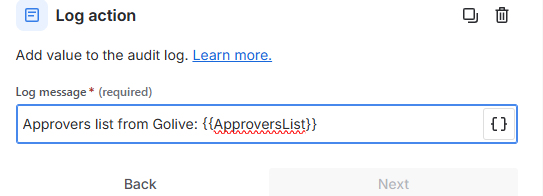
Step 4: Log Action – Approvers List
Log the raw approvers list to the audit log for troubleshooting and verification.
Step 5: Branch Rule – Iterate Through Approvers
Use Advanced branching to process each approver individually.
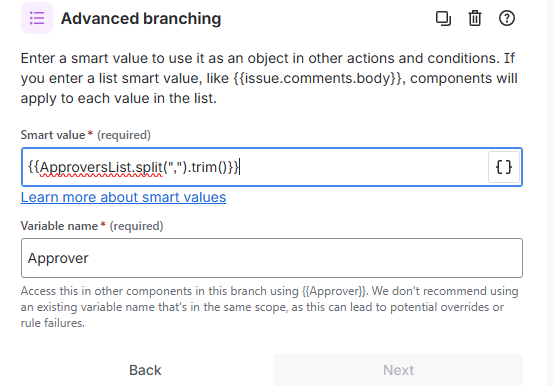
Smart value:
{{ApproversList.split(",").trim()}}
Variable name: Approver
Important
Ensure the separator matches the format used in Golive (comma in this example).
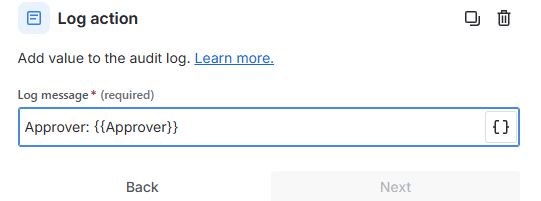
Step 6: Log Action – Current Approver
Log each approver value as it is processed.
Step 7: Send Web Request – Resolve Jira User ID
This request resolves the approver name to a Jira user account ID.
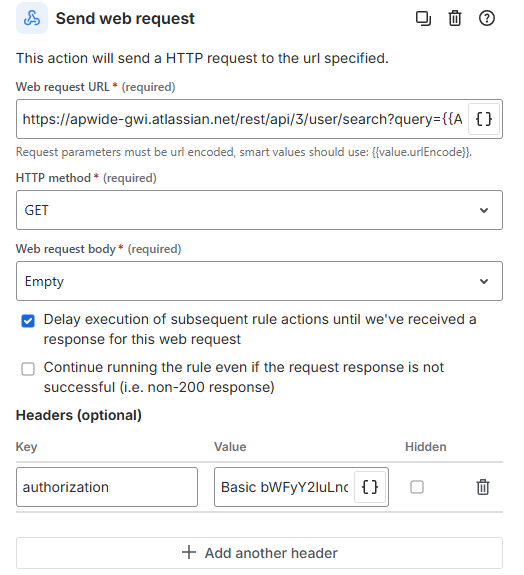
Web request URL:
https://YOUR_JIRA_NAME_HERE.atlassian.net/rest/api/3/user/search?query={{Approver.urlEncode}}&maxResults=1
HTTP method: GET
Headers:
-
authorization: Basic (Base64-encoded user email and API token)
Important
Enable Delay execution of subsequent rule actions until response is received.
Step 8: Create Variable – Approver ID
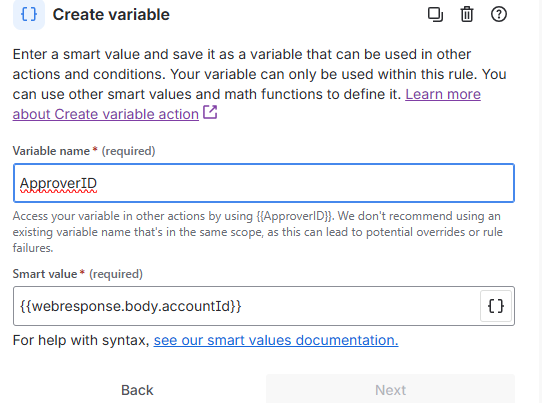
Variable name: ApproverID
Smart value:
{{webresponse.body.accountId}}
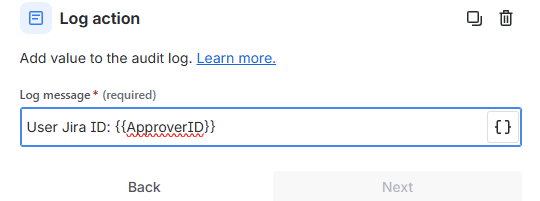
Step 9: Log Action – Approver ID
Log the resolved Jira user ID for audit and debugging purposes.
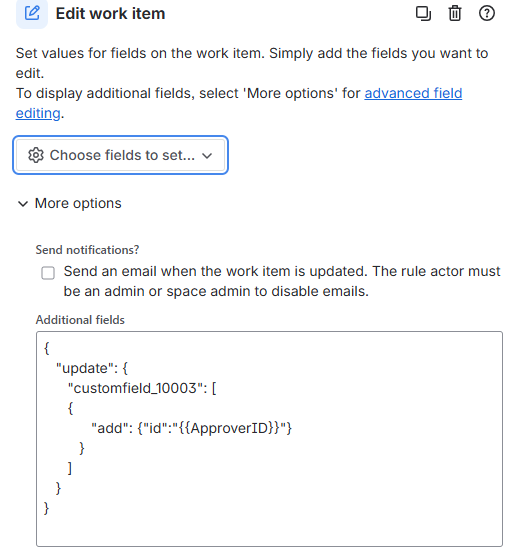
Step 10: Edit Work Item – Add Approver
Add the resolved user to the Approvers field.
Use More options and update the custom field ID to match your Jira instance.
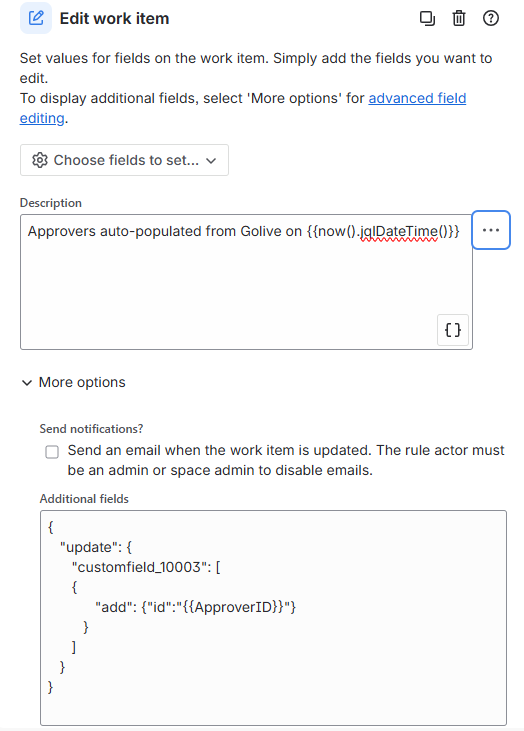
You can specify what changes you would like to put into selected fields (e.g. description as in our example).
Use More options for adding users to the Approvers field. Make sure to update Custom Field ID (10003 in our example) to match the ID of Approvers field in your Jira instance.
Additional fields:
{
   "update": {
      "customfield_10003": [
      {
            "add": {"id":"{{ApproverID}}"}
         }
      ]
   }
}
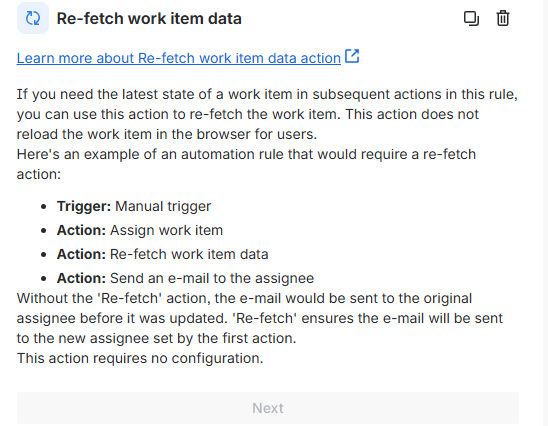
Step 11: Re-fetch Work Item Data
Re-fetch the issue to ensure the Approvers field is updated before evaluating conditions.
Step 12: Condition – Prevent Duplicate Entries
This condition allows multiple approvers to be added while avoiding duplicates.
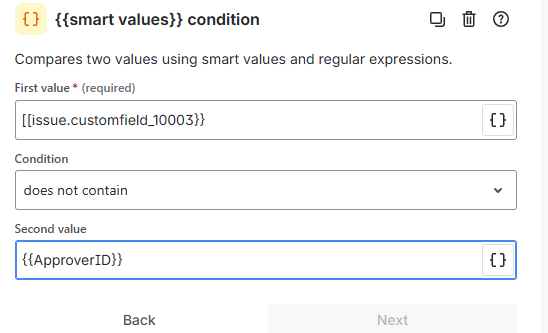
First value:
{{issue.customfield_10003}}
Condition:
Does not contain
Second value:
{{ApproverID}}
Step 13: Edit Work Item – Add Additional Approver
If the condition passes, add the user to the Approvers field again using the same configuration as Step 10.
Use More options for adding users to the Approvers field. Make sure to update Custom Field ID (10003 in our example) to match the ID of Approvers field in your Jira instance.
Additional fields:
{
   "update": {
      "customfield_10003": [
      {
            "add": {"id":"{{ApproverID}}"}
         }
      ]
   }
}
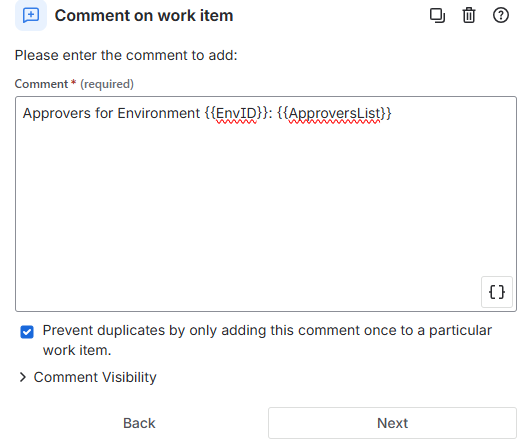
Step 14: Add Comment to Work Item
Add a comment containing the original approvers list from Golive.
This allows quick verification that all approvers were successfully mapped and added.
Need Assistance?
For support with integrating Golive and Jira Automation, reach out to our Customer Portal.