Advanced Settings
Learn how to access and define Advanced Settings and preferences in Golive.
Golive provides a range of Advanced Settings that allow you to customize various aspects of the app, including date formats, calendar preferences, security settings (Data Center only), and menu labels (Data Center only). This article will guide you through how to access and modify these settings to suit your needs.
Accessing the Advanced Settings
Click the gear icon located in the upper-right corner of any Golive Page.
From the drop down menu, select Golive Settings.
In the Settings section, choose Advanced Settings.
Configuring KPIs visibility
On the Advanced Settings page, you can control the visibility of the following KPIs on the Environment Details screen:
Availability KPI
Usage KPI
To configure KPI visibility:
Click the Edit button next to the KPI you want to modify.
Select Visible or Hidden.
Click Save to apply the changes.
For more details about KPIs, refer to the Environment KPIsarticle.
Customizing Date Formats
On the Advanced Settings page, you can adjust Jira's working hours per day by clicking the corresponding Edit button. This setting aligns with Jira Time Tracking and is used to calculate and display issue duration fields, such as Estimates and Time Spent.
Customizing Date Mode
On the Advanced Settings page, you can choose between Legacy or Default Date Modes for your Calendar by clicking the corresponding Edit button.
Info
Before version 8.5, the app was using the Legacy date mode
Default Date Mode
If no time information is provided, the Start Date will default to the beginning of the day, and the End Date will default to the end of the day. As a result, an event starting and finishing on the same date will have a duration of 1 full day (recommended settings).
Legacy Date Mode
If no time information is provided, both the Start Date and End Date will default to the beginning of the day. This means that an event starting and finishing on the same date will have no duration and will be treated as a milestone (default behaviour before Golive 8.5)
Security

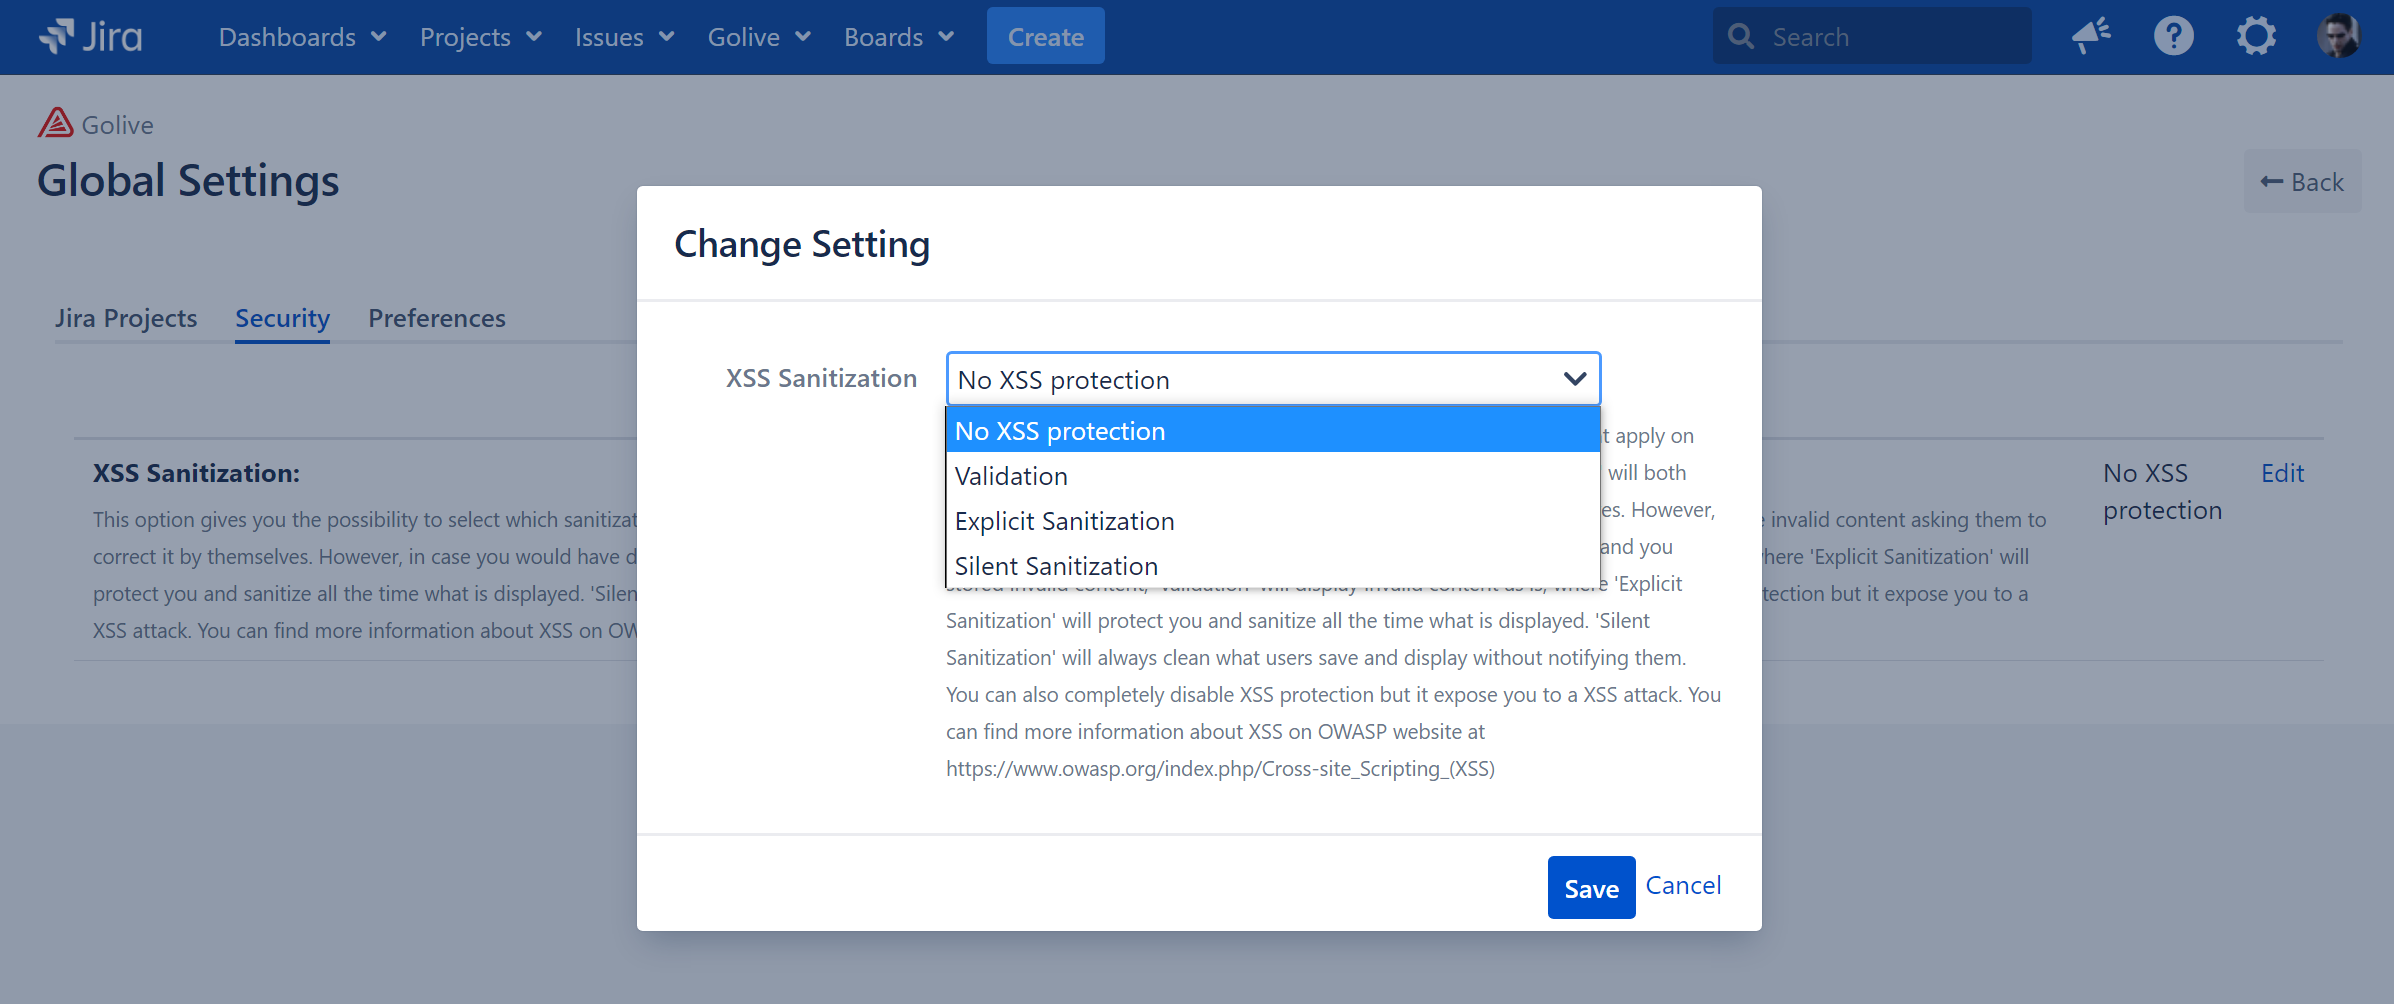
In the Security section, you can adjust the XSS Sanitization Mode to control how HTML fields, such as attribute values, are sanitized.
Validation and Explicit Sanitization: Prevent users from saving invalid content, prompting them to correct it. If sanitization was disabled and invalid content was stored, Validation will display the content as-is, while Explicit Sanitization will clean the content before displaying it.
Silent Sanitization: Automatically sanitize saved content without notifying users.
No XSS Protection disables XSS protection entirely.
Caution
Disabling XSS protection completely with the No XSS Protection option will expose your system to attacks. This option should be used with extreme caution
For more information on Cross-Site Scripting (XSS), visit the OWASP website.
Preferences
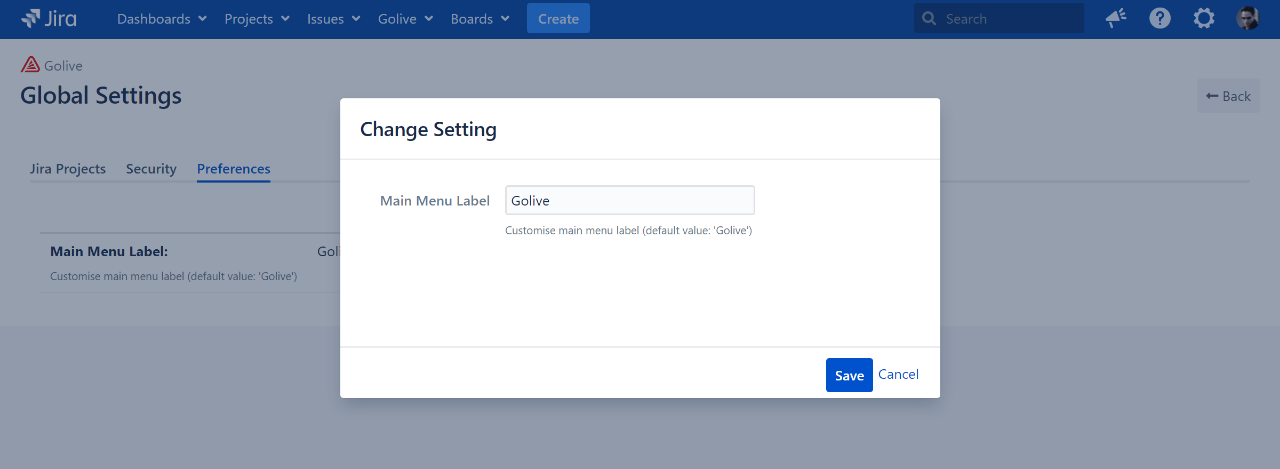
Main Menu Label
By default, the GoLive menu displayed in the Jira navigation bar is labeled “Golive”. In the Preferences section, you can change this label to something more relevant. For example, you can rename it to Environments.


