With Teams Workflows, you can automatically send notifications to a designated MS Teams channel whenever there is a change in your Golive Environments. In this article, you’ll find step-by-step instructions on setting up Teams Workflows and Golive Automations to receive these notifications.
Requirements
-
Your Environments are configured in Golive.
-
You have set up an MS Teams channel where you want to receive Golive notifications.
Step 1: Configure Teams Workflows
-
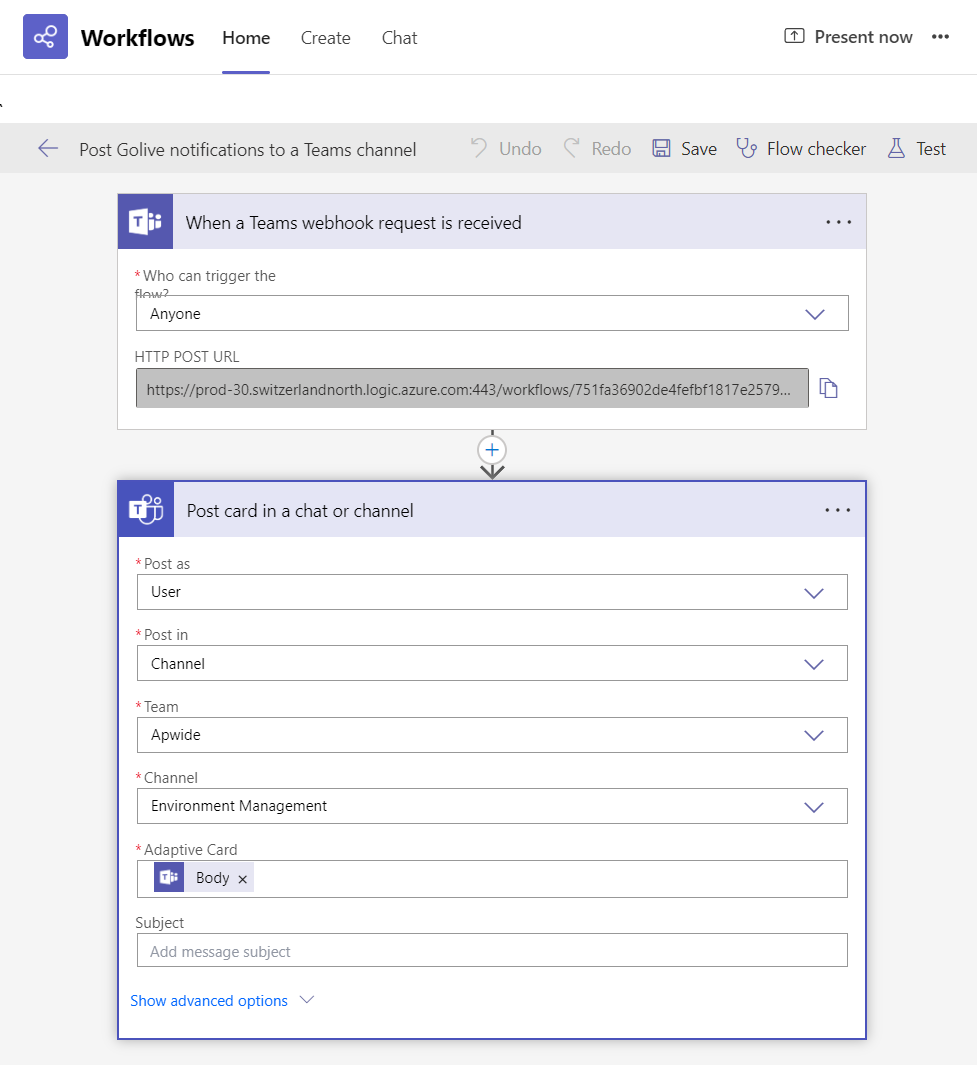
In your Teams application, open the Workflows App from the left navigation menu.
Info
If the icon is not visible, you may have to click the View more apps button (three dots icon).
-
Enter a descriptive title for your flow, such as “Post Golive notifications to a Teams channel”.
-
Click + New flow at the top right corner.
-
Click + Create from blank.
-
Add the trigger When a Teams webhook request is received to you flow.
-
In the Who can trigger the flow? field, select Anyone.
-
Click + New step.
-
Add the action Post card in a chat or channel.
-
In the Post as field, select User.
-
In the Post in field, select Channel.
-
In the Team field, select the team your target channel is part of.
-
In the Channel field, select the channel where you want your notifications to be posted.
-
In the Adaptive Card field, select the expression
triggerBody(). -
Click the Save.
-
Open your trigger When a Teams webhook request is received and copy the
HTTP POST URLvalue, as you'll need in the next step.
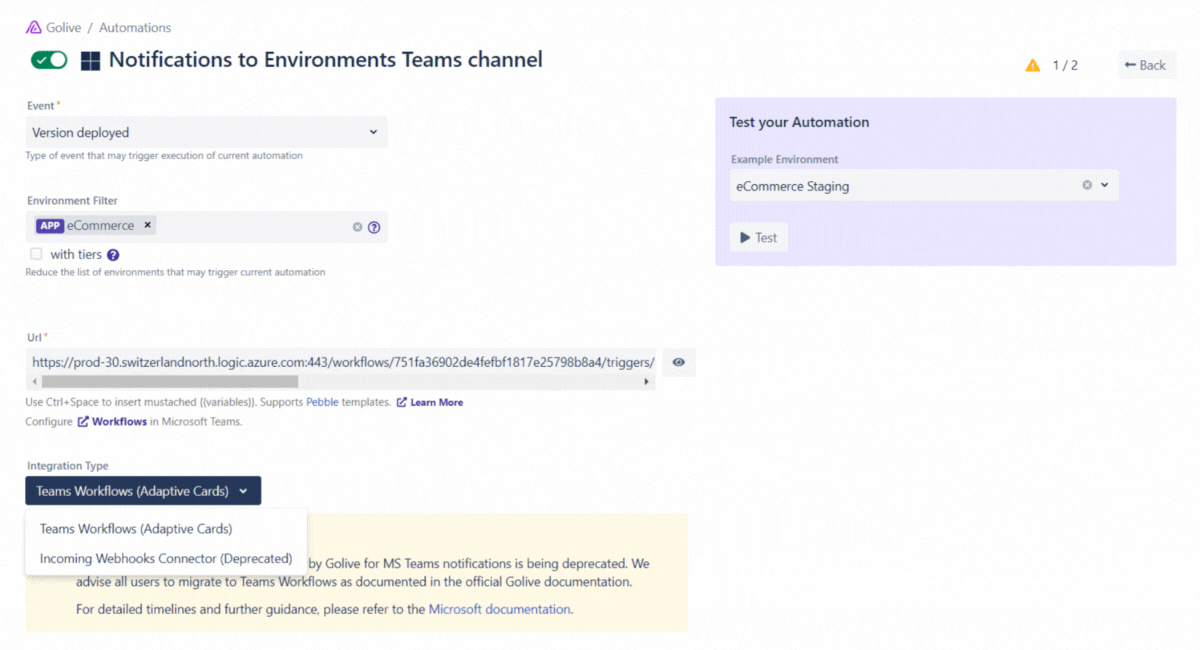
Step 2: Configure your Golive Automation
-
In Golive, click the Golive Menu button (gear and downward arrow icon).
-
From the drop-down menu, select Automations.
-
Click + Add Automation at the upper right corner.
-
Select Send a MS Teams message and click Next.
-
Choose the Event you want to trigger the notification and click Done.
Tip
If you need notifications for multiple events, create separate Golive Automation rules for each event.
-
Click the New Automation title and enter a descriptive name. For example, “Notifications to Environments Teams channel on Environment status change”.
-
To restrict the rule to specific Golive Environments, you can add a filter in the field Environment Filter field.
-
In the Url field, paste the
HTTP POST URLvalue you copied in Step 1. -
Make sure Teams Workflows is selected in the Integration Type field, because the Incoming Webhooks Connector is deprecated.
-
Click Save next to the automation rule title.
-
In the Test your Automation section on the right, select an Environment to test with.
-
Click the Test button:
-
If the test is successful: Click on the toggle in the upper left corner, in order to enable the Golive Automation rule.
-
If the test is unsuccessful: Troubleshoot using the execution details in Golive and the run history in Teams Workflows
-