
You can import Environments and other data into Golive using the Rest API.
Here is an example using Postman and a CSV file as input.
Prerequisites
-
You have installed Postman (free version)
-
You have a working instance of Golive Cloud with admin rights
-
Applications, categories, attributes configuration is already done in Golive Cloud
Prepare your dataset
Let's assume we have existing configurations such as:
-
A list of Applications: eCommerce, Payment, ERP
-
A list of Categories: Dev1, Dev2, Integration1, Integration2
-
A set of Environment Attributes: OS, Database, Location
The first step is to prepare our CSV dataset containing the list of Environments with headers. Headers are important because they will be used by Postman as variable in our requests:
envName,applicationName,categoryName,envUrl,os,database,location
eCommerce Dev1,eCommerce,Dev,http://dev1.ecom.apwide.com,windows,mysql,Germany
eCommerce Dev2,eCommerce,Dev,http://dev2.ecom.apwide.com,windows,postgres,Switzerland
Payment Integration,Payment,Integration,http://int.pay.apwide.com,linux,oracle,Germany
ERP Integration,ERP,Integration,http://int.erp.apwide.com,windows,postgres,France
Small trick here, don't use "url" as header name for the environment URL attribute, otherwise Postman will use it as the URL to call during the import.
Prepare a "Create Environment" HTTP request in Postman
In Postman, create a new collection named "Golive Cloud Import".
Inside the new collection, create a POST request named "Create Environments" and define the following URL: https://golive.apwide.net/api/environment
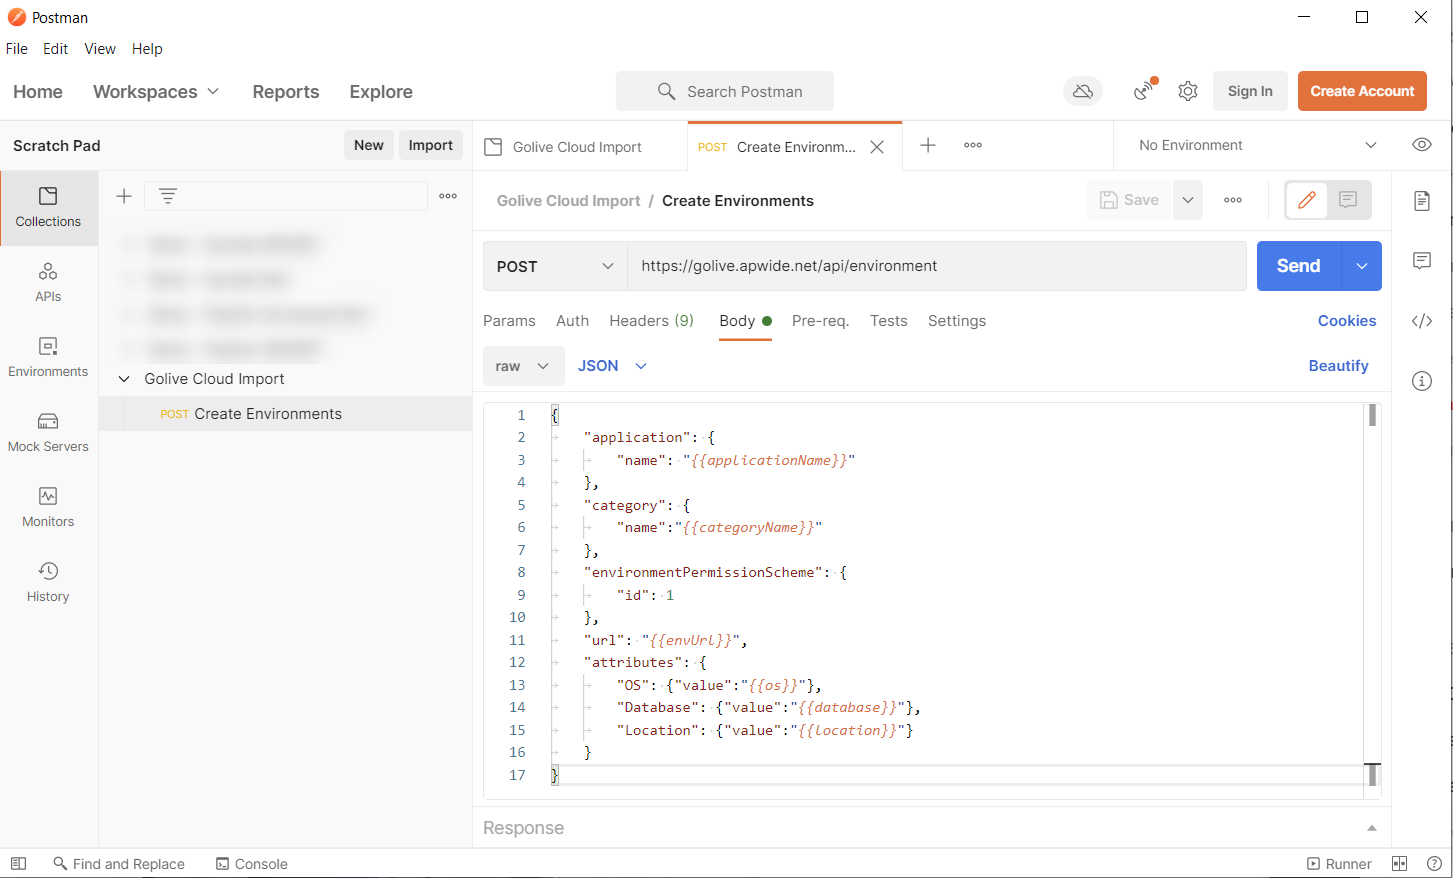
Use the following payload in the "Body" tab:
{
	"name": "{{envName}}",
	"application": {
		"name": "{{applicationName}}"
	},
	"category": {
		"name":"{{categoryName}}"
	},
	"environmentPermissionScheme": {
		"id": 2
	},
	"url": "{{envUrl}}",
	"attributes": {
		"OS": "{{os}}",
		"Database": "{{database}}",
		"Location": "{{location}}"
	}
}
You can find the CSV headers used as placeholders where we want to fill values of our environment payload: {{applicationName}}, {{categoryName}}, etc.
If you have static information, such as environmentPermissionScheme in our example, you don't need to get values from CSV, just hardcode the value in your payload.
Your Postman configuration should look like this:
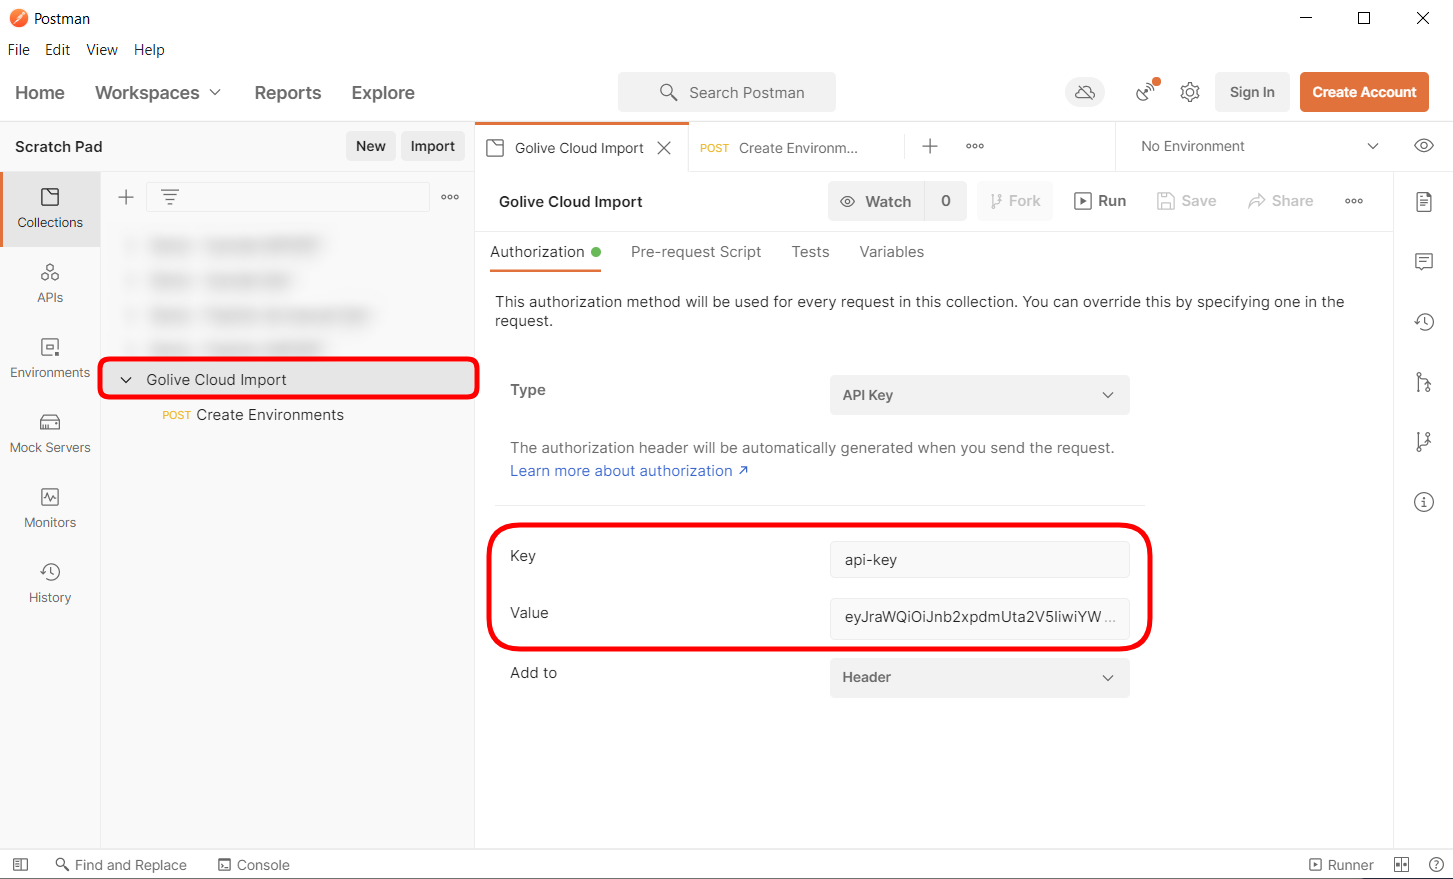
Authorize your HTTP request
To talk to the Golive Rest API, you need to be authorized. Generate an API token in Golive Cloud and copy-paste it as an api-key header on the Auth tab of your Collection, so that all your requests can inherit it:
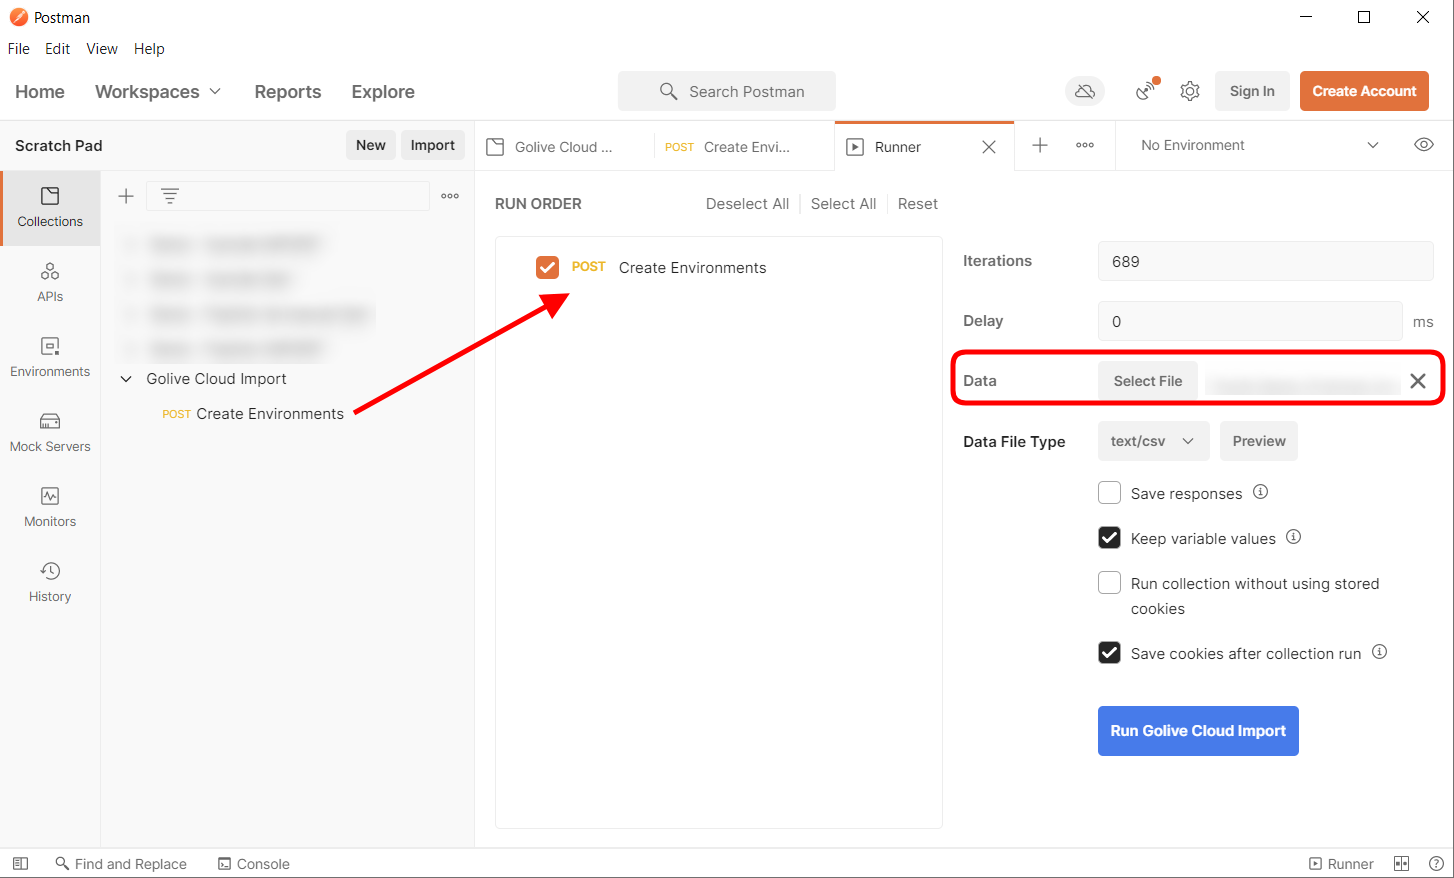
Run your data import
The last step to do is running our HTTP request using the CSV file as input. Click on "File > New Runner Tab" in Postman, drag-and-drop your "Create Environments" request and select your CSV file.
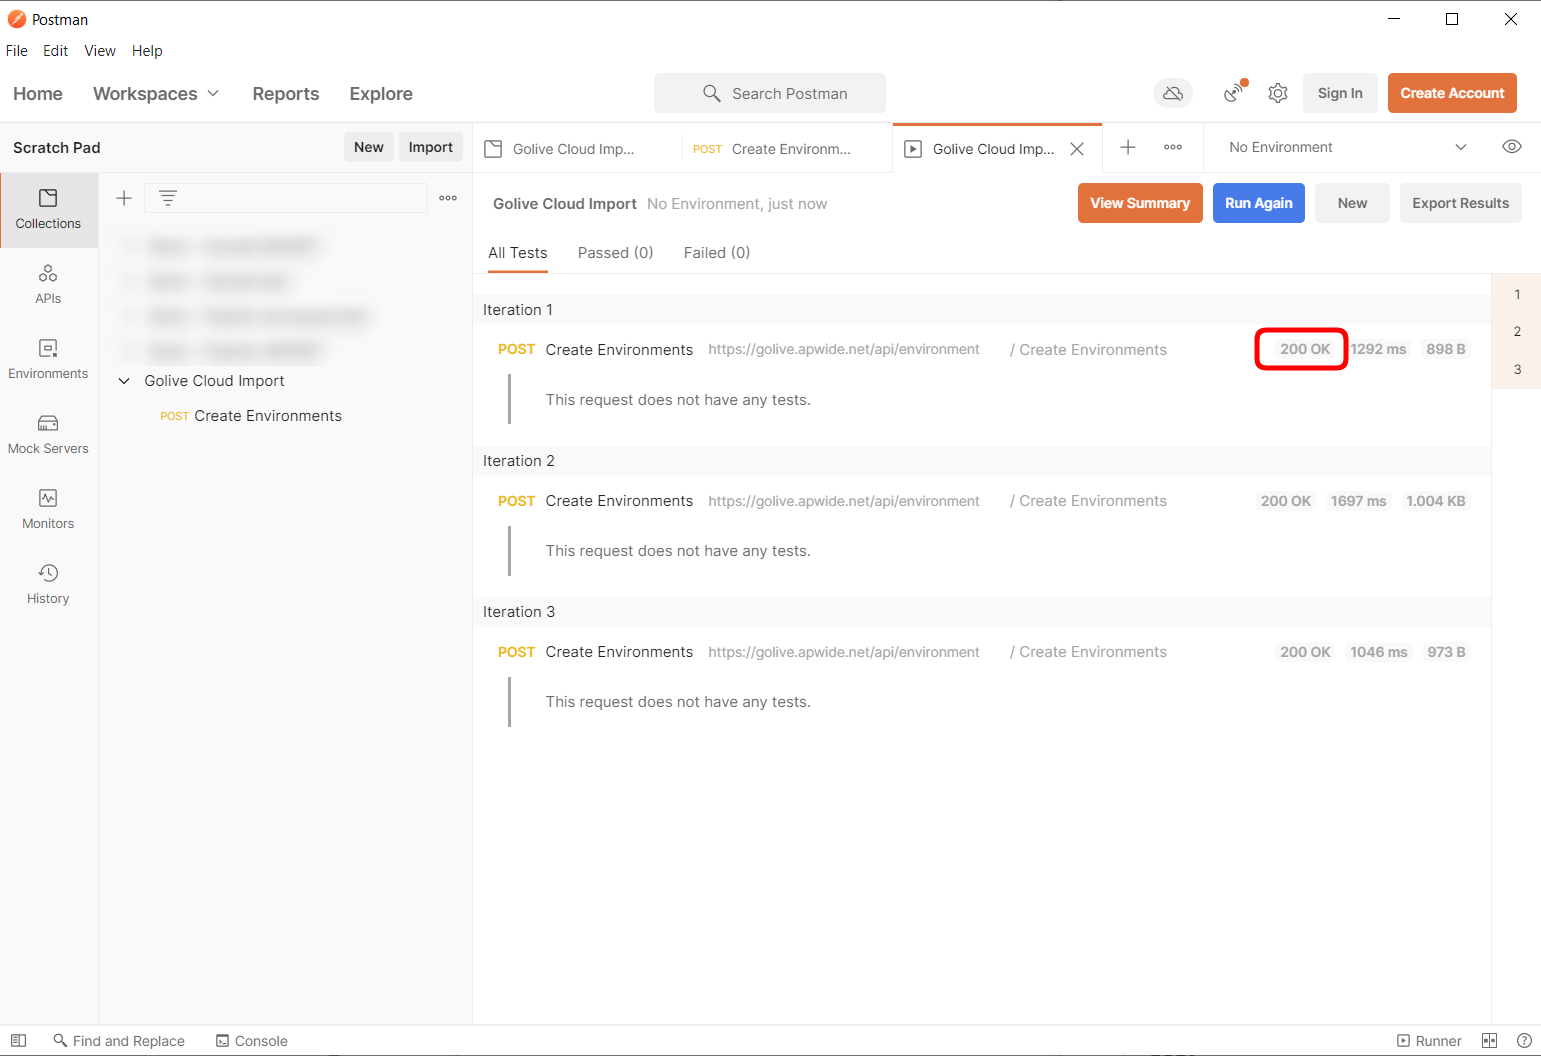
When you're ready, click on Run Golive Cloud Import and if everything went fine, you should see your "Create environment" requests executed with a 200 HTTP status:
The approach is the same to import Applications, Categories, Attributes, etc. Pick the endpoint you want to use from our Rest API , prepare your CSV, run your execution.
Need Help?
We are happy to assist you with your data import. Don't hesitate to contact us if you have any questions.