
This article explains where to find Timeline views, how to navigate Global and Project Timelines, and how to use key features like filters, settings, and calendars.
Access Timelines
All Timeline views can be accessed and managed from:
-
Global Timelines Page: Displays all Timeline views available in your Jira instance.
-
Project Timelines Page: Displays Timeline views specific to a project.
Understand Timeline Views Page Structure
Both Global and Project Timeline views share the same layout:
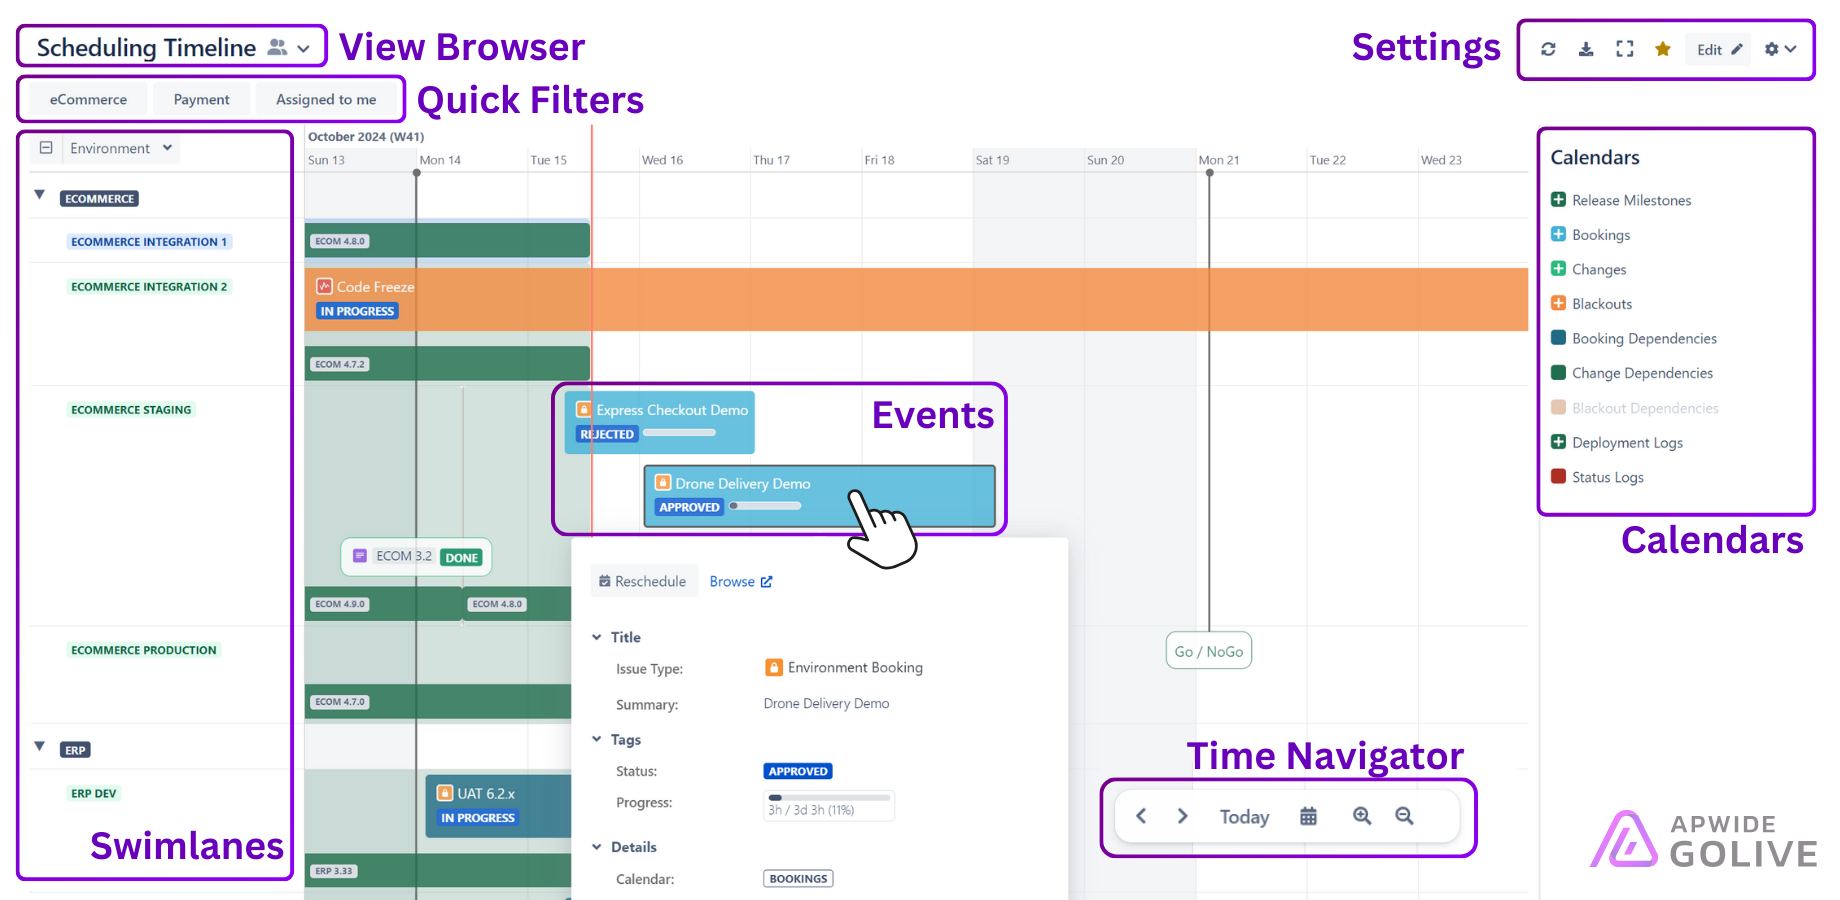
View Browser
The View Browser lets you switch between Timeline views, create new ones, search, and browse existing ones. Clicking it opens a drop-down with the following options:
-
+ Create Timeline: Create a new Timeline.
-
Pinned Timelines: Displays a list of Timelines that were pinned for faster access.
-
More Timelines: Search for additional Timelines not listed in the drop-down.
-
Manage Timelines: Manage Timelines based on whether you are on the Global or Project Timelines page.
Quick Filters
Placed under the Timeline Browser, the Quick Filters help narrow down relevant information.
Tip
To create Quick Filters, you must be in Edit Mode. For further details, refer to the Filter Events article.
Settings
Located at the top-right of the page, the Settings include:
-
Refresh: Reloads the Timeline.
-
Export: Export Events in the following formats:
-
XLSX
-
CSV
-
JSON
-
New iCal feed…
-
-
Full Screen: Expands the Timeline for better visibility.
-
Favorite: Marks the Timeline as a favorite.
-
Edit: Enables Edit Mode, allowing you to:
-
Settings: Central access to Project and Global Settings. It’s represented by a gear icon and provides the following options:
-
Timeline
-
Timeline Settings: Manage Timeline details like name, description, sharing, and pinning.
-
Copy: Duplicates the current Timeline.
-
Delete: Removes the current Timeline.
-
-
Time Squad
-
Shared Calendars: View and manage all shared calendars.
-
Settings: Configure settings for all Timelines.
-
Permissions: Define Global Roles and Permissions across Timelines.
-
-
Calendars
Use the Calendars Menu on the right side of your Timeline to:
-
Create Events: Use the drag-and-drop function or click the calendar to create a new event.
-
Show/Hide: Click the eye icon to display or hide events for a specific calendar.
-
Actions Menu: Click the three vertical dots next to the calendar to open the following options:
-
Create Event: Create a new Event on the Timeline.
-
View/Edit: Open the Calendar Details dialog to view or modify calendar details.
-
Info
If you cannot change settings of a given Calendar, you may not have sufficient permissions.
Swimlanes
Swimlanes improve Timeline readability by grouping Events into categories. For detailed information, refer to the Working with Swimlanes article.